Canning fresh salmon is a rewarding way to preserve a bountiful harvest, ensuring you have delicious, shelf-stable protein ready for quick meals. By pressure canning your own fish, you retain the superior flavor and texture that far exceeds commercial store-bought options. This method utilizes the salmon’s natural oils to keep every bite succulent throughout the storage period.
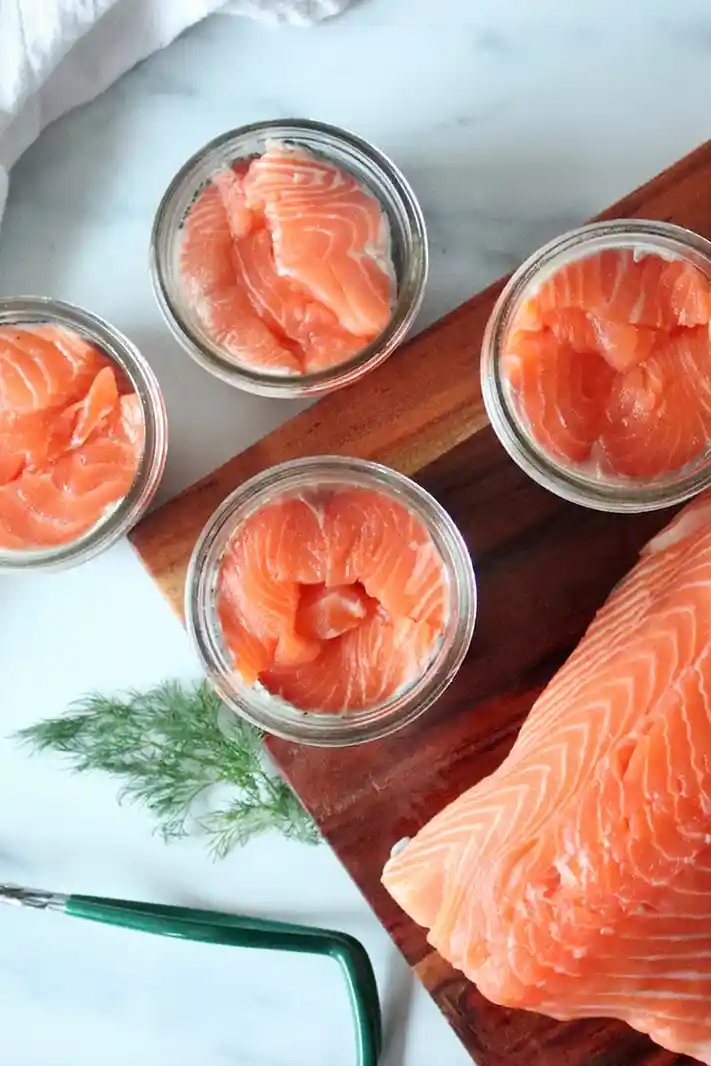
List of ingredients
- 4 lbs fresh salmon
- 1 tsp salt (optional)
step-by-step instructions
- Step: Keep fresh, cleaned fish cold until ready to can, using within two days.
- Step: Remove the tail, head, scales, fins, and skin, then wash thoroughly to remove all blood.
- Step: Cut salmon fillets into pieces that fit easily into pint jars.
- Step: Add two to three inches of water to your pressure canner and heat to a simmer.
- Step: Prepare and sterilize your jars.
- Step: Fill jars with salmon, leaving 1 inch of headspace. Do not add water or broth. Add 1/2 teaspoon of salt per jar if desired.
- Step: Wipe jar rims with a clean, damp cloth to remove debris.
- Step: Apply hot lids and screw metal bands until fingertip tight.
- Step: Place jars on a rack in the canner, ensuring space for steam circulation.
- Step: Secure the canner lid, vent steam for 10 minutes, then close the vent.
- Step: Increase pressure to 11 lbs for dial gauge or 10 lbs for weighted gauge.
- Step: Process jars for 100 minutes, adjusting pressure for altitude as needed.
- Step: Turn off heat, let pressure return to zero, wait 15 minutes, remove lid, cool jars in canner for 5 minutes, then cool at room temperature for 24 hours.
- Step: Check seals, label, and store.
Essential Preparation Techniques
Maintaining Cold Chain Integrity
Keeping your salmon at the correct temperature from the moment of harvest until you begin the canning process is vital for quality. Bacteria thrive at warmer temperatures, so keeping your raw fish on ice or inside a refrigerator ensures the final product remains fresh and firm. Never leave cleaned fish on a counter; if you cannot can immediately, keep it stored in the coldest part of your refrigerator.
Achieving Proper Headspace
Headspace refers to the empty room between the food and the top of the jar, which is critical for a successful vacuum seal during processing. When canning salmon, the 1-inch requirement allows the air to expand and escape, creating the necessary vacuum as the jar cools. Measuring this accurately prevents lid failure and ensures the safety and longevity of your preserved fish.
Understanding Pressure Canning Nuances
Managing Internal Canner Pressure
Reliable pressure is the cornerstone of safe canning for low-acid foods like fish. You must monitor your dial or weighted gauge closely; if the pressure falls below the required amount, the process time must technically be restarted to ensure total safety. Familiarize yourself with how your specific canner handles heat retention to avoid constant fluctuations.
Venting the Canner Correctly
The 10-minute venting process is a critical safety step that clears air out of the canner, ensuring the environment inside is pure steam rather than a mixture of air and steam. If the air is not properly vented, the temperature inside the canner will not reach the necessary heat for safe sterilization. Always start your 100-minute timer only after the full 10-minute venting cycle is complete.
Addressing Common Canning Questions
What are the small crystals found in my jar?
You may occasionally notice white, crystal-like structures in your canned salmon that look like glass. These are actually magnesium ammonium phosphate, which are naturally occurring and perfectly safe to consume. They typically disappear or dissolve completely when the fish is heated during preparation or serving.
Should I remove the skin before packing?
The decision to keep the skin on is a personal preference. Many home canners prefer keeping the skin on because the fats and oils released during the cooking process contribute to the moisture and flavor of the meat. If you do leave the skin on, ensure it is thoroughly scaled to improve the texture of the final product.
Is it necessary to remove the bones?
You do not need to remove the bones; during the long pressure canning process, the bones become soft enough to crush easily with a fork. They provide a source of calcium and are essentially flavorless once canned. Most people leave them in for convenience and to ensure they aren’t losing valuable meat during the deboning process.
Practical Serving Suggestions
Incorporating Salmon into Daily Meals
Once you have a pantry full of home-canned salmon, you will find it incredibly versatile for quick, healthy meals. Because it is pre-cooked, it can be flaked into pasta dishes, stirred into chowders, or served cold in salads. It is an excellent substitute for any recipe calling for canned tuna, often providing a richer, more satisfying flavor profile.
Storage and Shelf Life
For the best quality and flavor, store your jars in a cool, dark, and dry environment such as a basement pantry or a dark cupboard. While properly canned fish can remain safe for years, the quality of the flavor and texture begins to decline after approximately one year. Label your jars with the canning date to ensure you are rotating your stock effectively and using the oldest jars first.
Troubleshooting Seal Issues
Identifying Improperly Sealed Jars
After your jars have cooled for 24 hours, test the seals by pressing down on the center of the lid; it should not flex or make a clicking sound. If a jar fails to seal, you must store it in the refrigerator immediately and consume it within a few days. Do not attempt to re-process jars that have failed to seal unless you do so within 24 hours and use a new lid.
Managing Band Tension
Overtightening the metal rings can prevent air from escaping during the process, leading to buckle-lids or compromised seals. Always tighten to the point where you meet slight resistance using only your fingertips. This ensures the lid is secure enough to keep out contaminants while still being loose enough to allow the necessary venting of excess air.
Print
Preserving Your Catch: Home Canning Salmon
- Total Time: 120 minutes
- Yield: 16 servings 1x
- Diet: Pescatarian
Description
Canning salmon is the perfect way to preserve your wild catch, resulting in a flavor that is superior to store-bought varieties. This recipe is designed for a 4-pint or 8-half-pint canner batch, requiring approximately 1 pound of salmon per pint.
Ingredients
- 4 lbs fresh salmon
- 1 tsp salt (optional)
Instructions
- Step: Keep fresh, cleaned fish cold until ready to can, using within two days.
- Step: Remove the tail, head, scales, fins, and skin, then wash thoroughly to remove all blood.
- Step: Cut salmon fillets into pieces that fit easily into pint jars.
- Step: Add two to three inches of water to your pressure canner and heat to a simmer.
- Step: Prepare and sterilize your jars.
- Step: Fill jars with salmon, leaving 1 inch of headspace. Do not add water or broth. Add 1/2 teaspoon of salt per jar if desired.
- Step: Wipe jar rims with a clean, damp cloth to remove debris.
- Step: Apply hot lids and screw metal bands until fingertip tight.
- Step: Place jars on a rack in the canner, ensuring space for steam circulation.
- Step: Secure the canner lid, vent steam for 10 minutes, then close the vent.
- Step: Increase pressure to 11 lbs for dial gauge or 10 lbs for weighted gauge.
- Step: Process jars for 100 minutes, adjusting pressure for altitude as needed.
- Step: Turn off heat, let pressure return to zero, wait 15 minutes, remove lid, cool jars in canner for 5 minutes, then cool at room temperature for 24 hours.
- Step: Check seals, label, and store.
Notes
Salt is optional and used for flavor. Adjust pressure based on your specific altitude. You may occasionally notice magnesium ammonium phosphate crystals; these are safe and will dissolve when heated.
- Prep Time: 10 minutes
- Cook Time: 10 minutes
- Category: Fish
- Method: Pressure Canning
- Cuisine: American
Nutrition
- Serving Size: 1 serving
- Calories: 161 kcal
- Sugar: 0 g
- Sodium: 195 mg
- Fat: 7 g
- Saturated Fat: 1 g
- Unsaturated Fat: 5 g
- Trans Fat: 0 g
- Carbohydrates: 0 g
- Fiber: 0 g
- Protein: 22 g
- Cholesterol: 62 mg