Prepare a rich and savory meal with these creamy Italian chicken breasts made in a pressure cooker. This dish combines aromatic herbs and roasted red peppers for a restaurant-quality sauce in under 20 minutes.
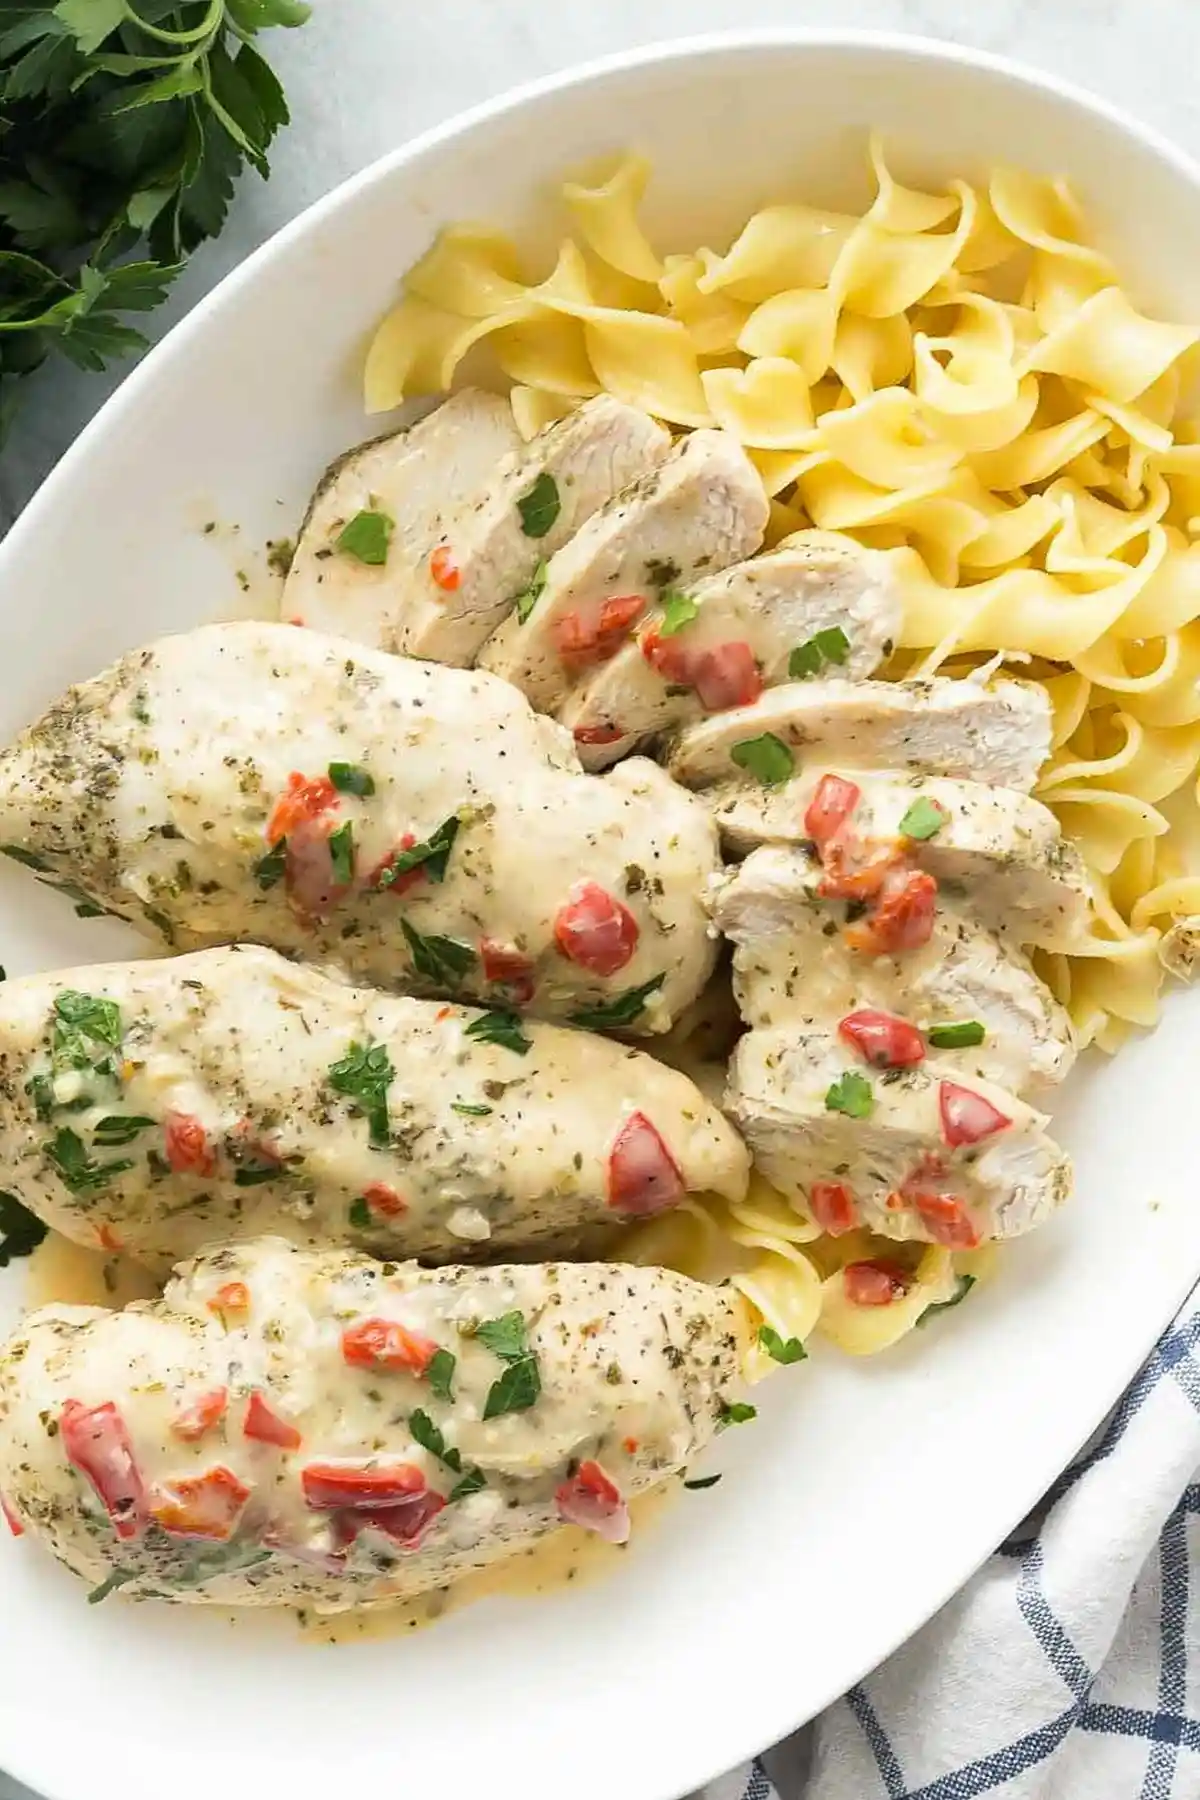
List of ingredients
- 1 cup low sodium chicken broth – provides the base for the savory sauce.
- 1/3 cup chopped roasted red peppers – adds a smoky sweetness.
- 1 tablespoon basil pesto – incorporates concentrated herbal flavor.
- 1 teaspoon minced garlic – enhances the aromatic profile.
- 1 teaspoon Italian seasoning – a blend of traditional Mediterranean herbs.
- 1/4 teaspoon salt – balances the overall seasoning.
- 1/4 teaspoon black pepper – adds a subtle spicy kick.
- 4 boneless skinless chicken breasts – the main protein for the dish.
- 1/3 cup heavy cream – creates the thick, luxurious texture.
- 1 1/2 tablespoons corn starch – acts as the thickening agent for the sauce.
step-by-step instructions
- Prepare the Sauce Base: Whisk together the chicken broth, roasted red peppers, pesto, minced garlic, Italian seasoning, salt, and black pepper in a bowl. Keep this mixture ready for the pot.
- Optional Searing: Switch the Instant Pot to the saute setting and add oil once hot. Sear the chicken breasts for 2 minutes on each side until golden brown to lock in flavor, taking care not to overcook them.
- Arrange Chicken and Sauce: Place the chicken breasts on the trivet or directly into the pot. Pour the prepared sauce mixture over the top of the chicken.
- Pressure Cook: Secure the lid and set the valve to sealing. Select Manual on high pressure for 6 minutes. Note that if you skipped searing, increase the time by 2-3 minutes, or add 4-5 minutes for frozen breasts.
- Release Pressure: Once the timer ends, allow the pressure to release naturally for 10 minutes. Perform a quick release for the remaining steam and open the lid carefully.
- Prepare for Thickening: Remove the chicken breasts and set them aside on a platter. Switch the pot back to the saute function. You may strain the cooking liquid to remove excess fat if desired.
- Create the Creamy Sauce: Mix the heavy cream and corn starch until smooth, then stir the mixture into the pot. Whisk continuously for 3-4 minutes until the sauce reaches a thick consistency.
- Combine and Serve: Return the chicken breasts to the sauce or pour the sauce directly over the chicken. Serve immediately while hot.
Optimizing Your Pressure Cooking Process
Preventing the Burn Notice
To avoid the burn warning, ensure the chicken broth is well-distributed at the bottom of the pot. Avoid stirring the sauce too vigorously after the cream is added to keep it smooth. Maintaining the correct liquid-to-thickener ratio prevents sticking.
Managing Chicken Breast Sizes
Use chicken breasts of similar thickness to ensure they all cook through at the same time. If some pieces are significantly larger, you can butterfly them to create a uniform thickness. This prevents the smaller pieces from drying out.
The Role of the Trivet
Using a trivet keeps the chicken elevated above the sauce, allowing steam to circulate more evenly around the meat. This method prevents the bottom of the chicken from becoming too mushy. However, cooking directly in the sauce is also an option for more flavor infusion.
Precision Timing for Frozen Meat
When using frozen chicken, increase the high-pressure cook time by 4 to 5 minutes. Frozen breasts release more moisture, which can dilute the sauce. You may need to simmer the sauce longer on the saute setting to achieve the desired thickness.
Ensuring Proper Internal Temperature
Always use a digital meat thermometer to verify that the chicken has reached an internal temperature of 165°F. This ensures the meat is safe to eat while remaining juicy. Remove the chicken immediately once it hits this target.
Ingredient Substitutions and Modifications
Lower Fat Cream Alternatives
Replace heavy cream with half-and-half or evaporated milk for a lighter sauce. While the richness will be slightly reduced, the flavor remains consistent. For a dairy-free option, use full-fat coconut milk or a cashew-based cream.
Using Chicken Thighs Instead of Breasts
Boneless skinless chicken thighs can be used for a more tender and fatty result. Increase the pressure cooking time by 2 to 3 minutes since thighs are denser than breasts. Thighs are generally more forgiving and less likely to overcook.
Replacing Roasted Red Peppers
If roasted red peppers are unavailable, use sun-dried tomatoes for a tangier profile. Pimientos are another good alternative that provides a similar color and mild sweetness. Ensure the substitute is chopped finely to blend into the sauce.
Homemade Pesto Options
You can make a quick pesto by blending fresh basil, garlic, olive oil, and parmesan cheese. Store-bought pesto works well, but homemade versions often have a fresher herbal taste. Adjust the amount of salt in the recipe if your pesto is very salty.
Salt-Free Broth Variations
Use unsalted chicken broth or a vegetable broth to control the sodium levels. If using water instead of broth, add a pinch more salt or a teaspoon of bouillon powder. This allows you to customize the saltiness to your preference.
Customizing the Flavor Profile
Increasing the Spice Level
Add a pinch of red pepper flakes or a dash of cayenne pepper to the sauce base for heat. Searing the chicken with a bit of paprika can also add a subtle warmth and deeper color. Adjust the spice level based on your heat tolerance.
Adding Fresh Greens
Stir in fresh baby spinach or chopped kale during the final thickening stage of the sauce. The residual heat will wilt the greens without overcooking them. This adds color and nutrients to the final dish.
Incorporating Fresh Mushrooms
Sauté sliced mushrooms in the pot before adding the chicken and sauce. Mushrooms add an earthy depth and a meatier texture to the meal. Use cremini or button mushrooms for the best results.
Adding a Cheesy Finish
Stir in a handful of grated parmesan or mozzarella cheese just before serving. The cheese will melt into the sauce, creating a thicker and more indulgent texture. This pairs exceptionally well with the Italian seasoning.
Enhancing the Garlic Punch
Use roasted garlic cloves instead of raw minced garlic for a sweeter, mellower flavor. You can also double the amount of minced garlic if you prefer a stronger aromatic presence. Garlic pairs perfectly with the basil pesto.
The Best Sides for Creamy Italian Chicken
Classic Pasta Pairings
Wide egg noodles or fettuccine are ideal for catching the thick cream sauce. Penne or rigatoni also work well, as the sauce can get trapped inside the pasta tubes. Toss the pasta in a bit of butter before topping with the chicken.
Hearty Grain Options
Serve the chicken over a bed of fluffy brown rice or quinoa for a gluten-free alternative. Farro provides a chewy texture and nutty flavor that complements the roasted red peppers. Grains absorb the extra sauce effectively.
Potato-Based Accompaniments
Garlic mashed potatoes are a classic choice that enhances the creaminess of the dish. Roasted fingerling potatoes or a baked potato also serve as a hearty base. The starch in potatoes balances the acidity of the pesto.
Fresh Vegetable Sides
Steamed broccoli or roasted asparagus provides a crisp contrast to the rich sauce. Sautéed zucchini slices with lemon juice offer a light, refreshing side. These options help balance the heaviness of the cream.
Light Salad Combinations
A simple arugula salad with a lemon vinaigrette cuts through the richness of the cream sauce. Fresh cucumber and tomato salads with a balsamic glaze also pair well. This keeps the overall meal feeling balanced.
Storage and Food Safety Guidelines
Refrigeration Best Practices
Store leftover chicken and sauce in an airtight glass or plastic container. Keep the chicken submerged in the sauce to prevent the meat from drying out. The dish will stay fresh in the refrigerator for up to 4 days.
Freezing the Chicken and Sauce
You can freeze the cooked chicken and sauce for up to 3 months. Use freezer-safe bags and squeeze out as much air as possible to avoid freezer burn. Label the bags with the date of preparation.
Optimal Reheating Methods
Reheat the chicken and sauce on the stovetop over low heat, adding a splash of milk or broth to loosen the sauce. Alternatively, use a microwave on medium power, heating in short intervals and stirring. Avoid overheating to prevent the cream from breaking.
Preventing Sauce Separation
Cream-based sauces can sometimes separate when reheated. To fix this, whisk in a small amount of warm milk or water while stirring over low heat. This emulsifies the fats and returns the sauce to a smooth state.
Preparing This Meal in Advance
Pre-Mixing the Sauce Base
You can whisk the broth, peppers, pesto, and seasonings together several hours in advance. Store the mixture in a sealed jar in the refrigerator until you are ready to cook. This reduces the active prep time on cooking day.
Searing Chicken Ahead of Time
Sear the chicken breasts a day early and store them in the fridge. When ready to cook, place the chilled seared chicken directly into the Instant Pot. This is a great way to speed up the evening routine.
Scheduling for Meal Prep
This recipe is ideal for weekly meal prep due to its stability during storage. Portion the chicken and sauce into separate containers for easy reheating. Pair them with pre-cooked grains or vegetables for a complete meal.
Frequently Asked Questions
Can this be made on a stovetop?
Yes, sear the chicken in a pan until golden. Whisk the sauce ingredients together, including the cream and cornstarch, and simmer everything together until the chicken is cooked through to 165°F.
Can this be made in a slow cooker?
Place the chicken in the crockpot and pour the sauce over it. Cook on high for 2 hours or on low for 3 to 4 hours. Thicken the sauce with the cream and cornstarch slurry at the end.
How do I stop the sauce from being too thin?
Ensure the cornstarch is fully dissolved in the cream before adding it to the pot. Let the sauce simmer on the saute setting for a few extra minutes to allow the starch to activate and thicken the liquid.
Can I use frozen chicken breasts?
Yes, you can use frozen breasts, but you must increase the pressure cooking time by 4-5 minutes. Be sure to drain some of the excess liquid released by the frozen meat before adding the cream.
Is it okay to stack the chicken?
It is perfectly fine to layer the chicken breasts in the pot. Just ensure that you season them thoroughly and that the sauce is poured over all layers to ensure even flavor distribution.
Print
Creamy Italian Instant Pot Chicken Breasts
- Total Time: 18 minutes
- Yield: 4 servings 1x
- Diet: General
Description
These Creamy Italian Instant Pot Chicken Breasts are moist, flavorful, and ready in minutes! Tender chicken breasts are coated in a creamy sauce made with chicken broth, cream, Italian herbs, and roasted red peppers!
Ingredients
- 1 cup low sodium chicken broth
- 1/3 cup chopped roasted red peppers
- 1 tablespoon basil pesto
- 1 teaspoon minced garlic
- 1 teaspoon Italian seasoning
- 1/4 teaspoon salt
- 1/4 teaspoon black pepper
- 4 boneless skinless chicken breasts
- 1/3 cup heavy cream
- 1 1/2 tablespoons corn starch
Instructions
- Whisk: Whisk together the broth, roasted red peppers, pesto, garlic, Italian seasoning, salt and pepper. Set aside.
- Sear: Turn the Instant Pot to saute. When it reads “hot”, drizzle oil in the bottom. Sear the chicken breasts on each side for 2 minutes until light golden brown.
- Arrange: Place the chicken on the trivet and add the sauce.
- Pressure Cook: Place lid on the Instant Pot and turn valve to sealing. Select Manual, high pressure, and set the timer to 6 minutes.
- Release: Once the cook time is over, turn the Instant Pot off and let pressure release naturally for 10 minutes, then do a quick release and open the lid.
- Prepare Sauce: Remove the chicken breasts and place on a cutting board or serving platter. Turn the Instant Pot to saute.
- Thicken: Stir together cream and corn starch and add to the pot. Whisk and cook for 3-4 minutes, until thickened. Add chicken back to the sauce or serve with the sauce over top if desired.
Notes
Straining the broth after cooking is optional to remove excess fat. Ensure chicken reaches an internal temperature of 165ºF. For a lighter sauce, you can substitute heavy cream with evaporated milk.
- Prep Time: 10 minutes
- Cook Time: 8 minutes
- Category: Main Course
- Method: Pressure Cooking
- Cuisine: American
Nutrition
- Serving Size: 1 serving
- Calories: 237 kcal
- Sugar: 1 g
- Sodium: 495 mg
- Fat: 12 g
- Saturated Fat: 6 g
- Unsaturated Fat: 4 g
- Trans Fat: 1 g
- Carbohydrates: 6 g
- Fiber: 1 g
- Protein: 26 g
- Cholesterol: 95 mg