This method provides a fast way to prepare crispy, breaded chicken breasts without the need for deep frying. It utilizes a simplified breading process that ensures a golden crust and juicy interior in under 20 minutes.

List of ingredients
- 1 lb boneless skinless chicken breasts (roughly 2 large)
- 1 tablespoon olive oil – used for brushing to help the breading adhere.
- 1/4 cup bread crumbs – regular crumbs are recommended for better seasoning distribution.
- 1/2 teaspoon salt – enhances the overall flavor of the coating.
- 1/4 teaspoon black pepper – adds a mild spicy note.
- 1/2 teaspoon paprika – provides color and a subtle sweetness.
- 1/8 teaspoon garlic powder – adds a savory, pungent depth.
- 1/8 teaspoon onion powder – complements the garlic for a classic savory taste.
- 1/16 teaspoon cayenne pepper – provides a very slight hint of heat.
step-by-step instructions
- Prepare: Heat the air fryer to 390°F / 200°C. Slice the chicken breasts in half horizontally to create two thin chicken breast halves from each breast. Brush each side of the meat lightly with olive oil.
- Bread: Stir together the bread crumbs, salt, black pepper, paprika, garlic powder, onion powder, and cayenne pepper in a bowl. Dredge the chicken breasts in the breading mixture multiple times until they are thoroughly and evenly coated.
- Cook: Shake off any excess breading from the chicken. Place the chicken in a single layer in the air fryer basket, cooking only two chicken breast halves at a time to ensure proper airflow. Cook for 4 minutes.
- Flip: Carefully flip the chicken breasts over. Cook for an additional two minutes. Use a digital thermometer to ensure the internal temperature has reached 165°F, or cut one piece in half to verify it is cooked through.
Breading Material Comparison
Standard Breadcrumbs for Flavor Distribution
Regular breadcrumbs are the most effective choice for this recipe because of their fine texture. The smaller particles allow the seasonings to cling evenly to every piece of crumb, ensuring consistent flavor in every bite. This prevents the spices from settling at the bottom of the bowl.
Panko Crumbs for Maximum Crunch
Panko breadcrumbs produce a lighter, airier crunch due to their larger flake size. However, because the flakes are larger, the dry seasonings often fail to adhere to the crumbs and sink to the bottom. If using panko, you may need to increase the seasoning amounts slightly.
Gluten-Free Breadcrumb Alternatives
Gluten-free breadcrumbs serve as a direct substitute for traditional crumbs without altering the cooking time. Most certified gluten-free crumbs maintain a similar density and browning capability. Ensure the brand used is finely ground to mirror the results of standard crumbs.
Air Fryer Equipment Optimization
Basket Style Air Fryer Performance
Basket-style models are ideal for this recipe as they allow for easy flipping and shaking. The concentrated heat source directly above the basket creates a rapid sear on the breading. Ensure the basket is not overcrowded to allow the hot air to circulate around all sides of the chicken.
Oven Style Air Fryer Adjustments
Oven-style air fryers often have larger capacities and different airflow patterns. When using these models, you may be able to fit more chicken pieces at once, but you must ensure they are not touching. Monitor the browning closely as the heating elements may be positioned differently than in a basket model.
Managing Airflow and Overcrowding
Overcrowding the air fryer basket blocks the circulation of hot air, which leads to soggy breading. To prevent this, cook the chicken in batches. This ensures that each piece is exposed to the maximum amount of heat, resulting in a uniform golden-brown crust.
Meat Preparation and Alternatives
Slicing Techniques for Even Cooking
Slicing the chicken breast horizontally into cutlets is essential for a 6-minute cook time. By reducing the thickness of the meat, the heat penetrates to the center much faster. This prevents the exterior breading from burning before the interior reaches the safe temperature of 165°F.
Substituting Chicken Thighs
Boneless skinless chicken thighs can be used with the same breading mixture. Thighs have a higher fat content, which often results in a juicier end product. However, because thighs are denser and typically thicker, you will need to increase the cooking time by several minutes.
Ensuring Proper Surface Moisture
Before applying the olive oil, pat the chicken breasts dry with paper towels. Excess surface moisture can create a barrier between the meat and the oil, or cause the breading to become paste-like. A dry surface allows the oil and crumbs to bond more effectively.
Meal Pairing Ideas
Roasted Vegetable Side Dishes
Balsamic roasted Brussels sprouts provide a tangy contrast to the savory breading. Maple roasted butternut squash offers a sweet element that complements the paprika and cayenne in the chicken. Both can be prepared in the oven or air fryer for a cohesive meal.
Fresh Salad Accompaniments
A staple kale salad with a lemon vinaigrette cuts through the richness of the breaded chicken. The acidity of the dressing helps balance the savory notes of the garlic and onion powder. Adding toasted seeds or nuts to the salad adds an extra layer of texture.
Starchy Side Options
Ultra-crispy grilled potatoes or fluffy Parmesan mashed cauliflower are excellent pairings. The creamy texture of mashed cauliflower contrasts well with the crunch of the air-fried crust. These sides provide the necessary substance to make the chicken breasts a full dinner.
Long-term Storage and Preservation
Refrigeration Guidelines
Once the chicken has cooled completely, place it in an airtight container. It can be stored in the refrigerator for up to three days. To maintain the quality of the breading, avoid stacking the pieces too tightly, which can trap moisture and soften the crust.
Flash Freezing for Future Use
To freeze this chicken, arrange the breaded pieces on a baking sheet in a single layer. Freeze them for 2 to 4 hours until they are completely solid. This process, known as flash freezing, prevents the pieces from sticking together when transferred to a freezer bag.
Freezer Storage Duration
Properly bagged and frozen chicken breasts can be stored for up to three months. Ensure the freezer bag is pressed flat to remove as much air as possible, reducing the risk of freezer burn. Label the bag with the date and the internal temperature required for reheating.
Reheating Methods for Maximum Crispiness
Using the Air Fryer for Reheating
The air fryer is the best tool for reheating breaded chicken. Preheat the unit to 390°F / 200°C and heat the chicken for 2 to 3 minutes. This process evaporates surface moisture and recrisps the breadcrumbs without overcooking the interior.
Conventional Oven Reheating
If an air fryer is unavailable, use a conventional oven preheated to 375°F. Place the chicken on a wire rack over a baking sheet to allow air to circulate underneath. Heat for 5 to 10 minutes until the chicken is warmed through and the coating is firm.
Avoiding the Microwave
Microwaving breaded chicken is not recommended because it steams the breading. This results in a rubbery texture and soggy crust that cannot be easily fixed. If you must use a microwave, keep the heating time very short and finish the chicken in a pan for one minute.
Solving Common Cooking Issues
Preventing Breading from Falling Off
If the breading separates from the meat, it is often due to a lack of binder or too much moisture. Ensure the chicken is patted dry and brushed evenly with olive oil. Pressing the breadcrumbs firmly into the meat during the dredging process also helps secure the coating.
Avoiding Dry Chicken Breast
Dry chicken usually occurs from overcooking. Because the cutlets are thin, they cook very rapidly. Use a digital meat thermometer to pull the chicken out exactly when it hits 165°F, as carry-over cooking will raise the temperature slightly further after removal.
Managing Uneven Browning
Uneven browning is often caused by overlapping chicken pieces in the basket. Ensure there is at least a half-inch of space between each piece. If some areas remain pale, a quick 30-second blast at a higher temperature can finish the browning process.
Frequently Asked Questions
Can I make this recipe keto-friendly?
Yes, you can replace the breadcrumbs with a mixture of almond flour and finely grated Parmesan cheese. This maintains a similar texture and flavor profile while significantly reducing the carbohydrate count. Adjust the salt slightly as Parmesan cheese is naturally salty.
What is the safe internal temperature for chicken?
The USDA recommends an internal temperature of 165°F (74°C) for all poultry. Use a meat thermometer inserted into the thickest part of the breast to verify this. Cooking beyond this temperature may lead to dry meat.
Can I use an oil spray instead of brushing?
Yes, an oil spray is a practical alternative to brushing. Spray both sides of the chicken generously before dredging in the breadcrumbs. Ensure the spray is evenly distributed to prevent dry patches in the breading.
Does this recipe work for meal prep?
This recipe is excellent for meal prep because it reheats well in the air fryer. You can cook a large batch, store them in the fridge, and reheat them throughout the week. They also taste good cold in wraps or salads.
Can I cook the chicken from frozen?
Yes, you can cook the breaded chicken from frozen. However, you will need to increase the cooking time and potentially lower the temperature slightly to ensure the center thaws and cooks before the exterior burns. Thawing in the fridge overnight is the preferred method for best results.
Print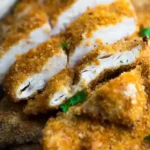
20 Minute Air Fryer Chicken Breast
- Total Time: 21 minutes
- Yield: 4 servings 1x
- Diet: General
Description
A quick but flavorful recipe to cook chicken breast in the air fryer- ready in just 20 minutes! With a simple breading that gets crispy and adds so much flavor.
Ingredients
- 1 lb boneless skinless chicken breasts
- 1 tablespoon olive oil
- 1/4 cup bread crumbs
- 1/2 teaspoon salt
- 1/4 teaspoon black pepper
- 1/2 teaspoon paprika
- 1/8 teaspoon garlic powder
- 1/8 teaspoon onion powder
- 1/16 teaspoon cayenne pepper
Instructions
- Prepare: Heat air fryer to 390°F / 200 °C. Slice chicken breasts in half horizontally to make two thin chicken breast halves from each. Brush each side lightly with olive oil.
- Bread: Stir together the breading ingredients. Dredge the chicken breasts in the breading multiple times until they are thoroughly coated.
- Cook: Shake off excess breading, and place in a single layer in the air fryer (2 chicken breast halves at a time). Cook for 4 minutes.
- Flip: Flip, then cook for two more minutes. Precise cook time will depend on the size and thickness of your chicken breasts, so either check with a digital thermometer that chicken has reached 165°F or cut one in half.
Notes
Regular breadcrumbs are recommended over panko as the seasonings mix in better. For a gluten-free option, gluten-free breadcrumbs work well.
- Prep Time: 15 minutes
- Cook Time: 6 minutes
- Category: Dinner
- Method: Air Frying
- Cuisine: American
Nutrition
- Serving Size: 1 chicken breast half (roughly 3.5 oz)
- Calories: 188 kcal
- Sugar: 1 g
- Sodium: 472 mg
- Fat: 6 g
- Saturated Fat: 1 g
- Unsaturated Fat: 5 g
- Trans Fat: 0 g
- Carbohydrates: 5 g
- Fiber: 1 g
- Protein: 25 g
- Cholesterol: 72 mg