This one-pot meal combines savory ground beef and fluffy rice with a sweet and salty glaze. It is a fast, filling dinner option that minimizes cleanup by using a pressure cooker.
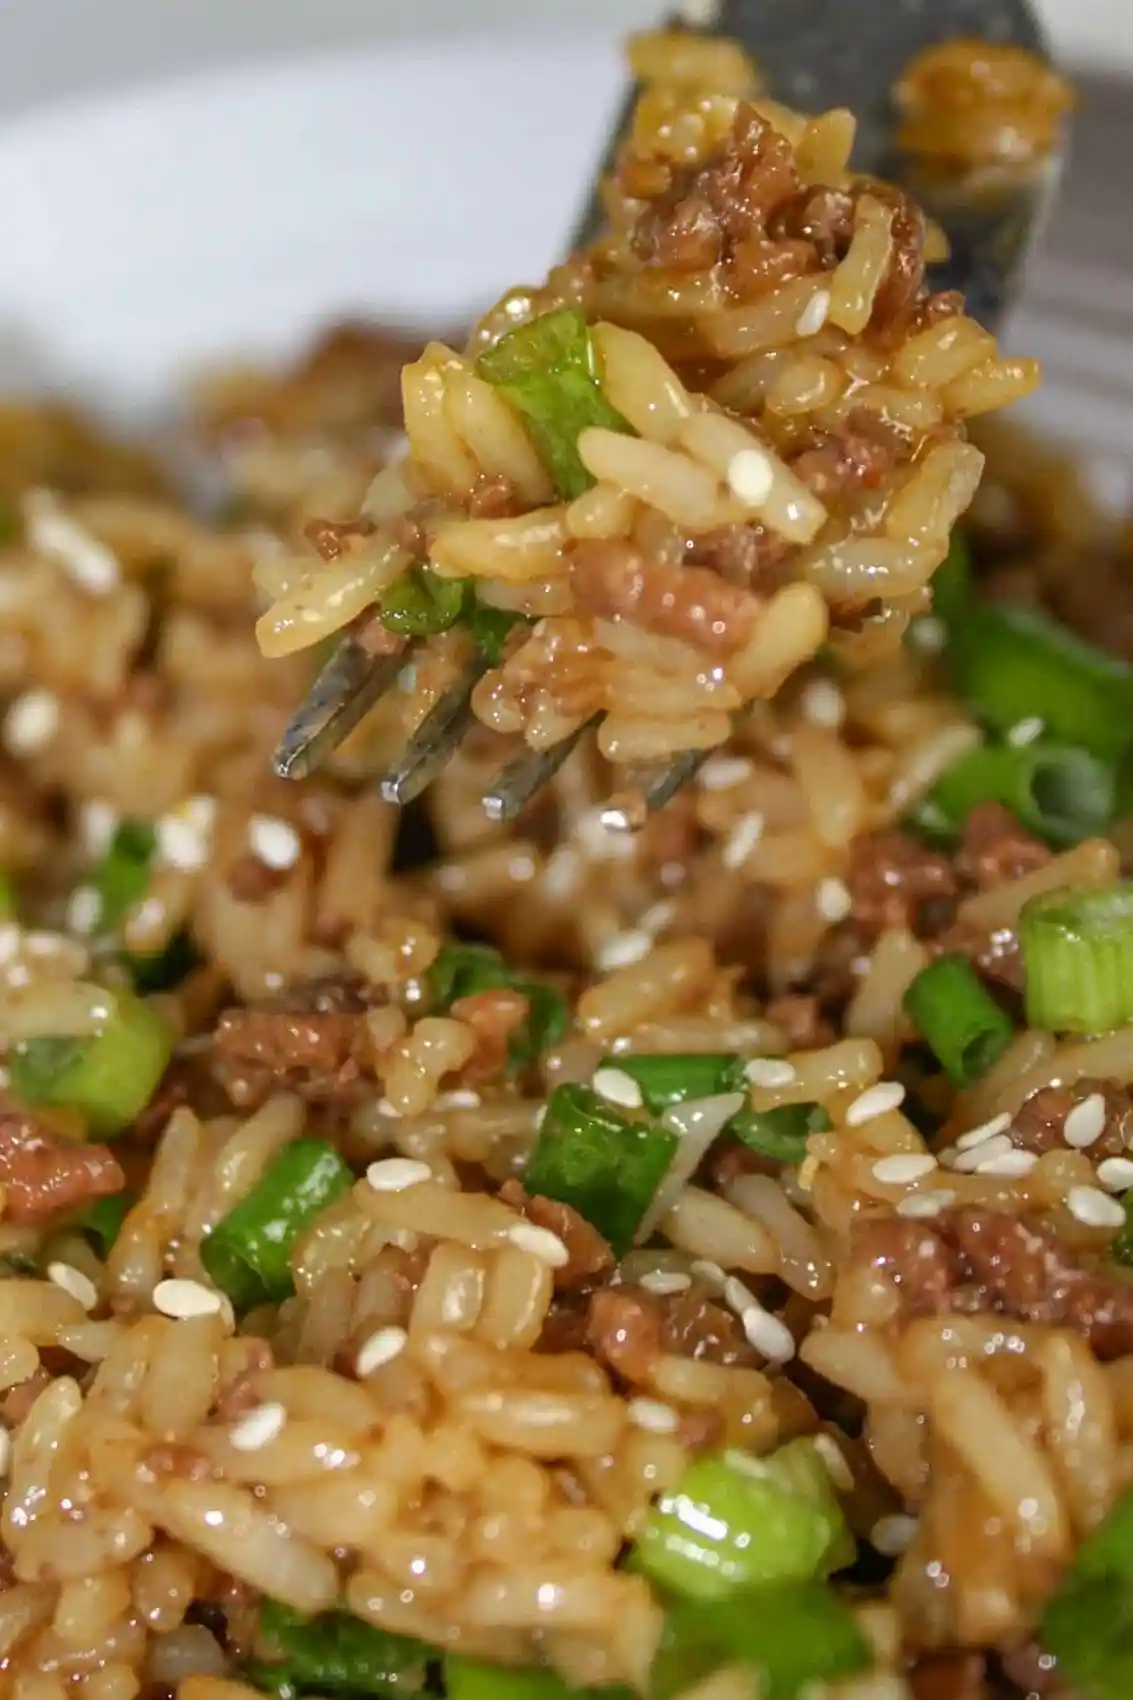
List of ingredients
- 2 tbsp olive oil – used for searing the beef.
- 1 lb lean ground beef – provides the main protein.
- 5 cloves garlic pressed – adds aromatic depth.
- 1 tsp salt – enhances overall flavor.
- 1/2 tsp pepper – adds a mild spice.
- 2 1/2 cups water – used for cooking the rice.
- 2 cups long grain rice – the base of the dish.
- 1/2 cup brown sugar – provides sweetness for the sauce.
- 1 tsp corn starch – thickens the glaze.
- 1/2 cup soy sauce – adds salty, umami flavor.
- 1/4 tsp ground ginger – adds a warm, spicy note.
- 1/2 tsp chili peppers – provides a subtle heat.
- 8 green onions chopped – used for freshness and garnish.
- Sesame seeds – optional garnish for texture.
step-by-step instructions
- Sauté the Pot: Add the olive oil to the Instant Pot and turn it to the Saute Less function for 7 minutes.
- Brown the Beef: Add the ground beef to begin to brown and break it up while it is cooking.
- Season the Meat: After it starts to brown add the garlic, salt and pepper. Continue breaking up the beef into small crumbles.
- Deglaze the Bottom: Once Pot turns off add the water and scrape any brown bits from the bottom of the Pot to avoid the burn notice.
- Add the Rice: Sprinkle in the rice and press it down into the liquid. Do not stir the mixture.
- Pressure Cook: Place the lid on the Instant Pot, turn the steam release handle to the sealing position and set the Instant Pot to Pressure Cook High for 6 minutes.
- Prepare the Glaze: While the rice and beef are cooking prepare the sauce by dumping the brown sugar, corn starch, soy sauce ground ginger and chili peppers into a small mixing bowl. Stir to combine.
- Prep Garnish: Cut up the green onions into small rounds.
- Release Pressure: Once the Instant Pot is done cooking, immediately turn the steam release handle to the venting position and do a Quick Release.
- Mix the Base: Remove the lid and stir the contents well to distribute the beef and rice.
- Coat with Sauce: Pour in the sauce and stir until the meat and rice are thoroughly coated.
- Final Touch: Dump in the green onions and stir to combine.
- Serve: Serve immediately and sprinkle on sesame seeds if desired.
Essential Cooking Tips
Deglaze Thoroughly to Prevent Burn Error
Scraping the bottom of the inner pot after browning the beef is the most critical step. Any caramelized bits of meat stuck to the bottom can trigger the burn sensor during the pressure cooking cycle. Use a wooden spoon or silicone spatula to ensure the surface is completely smooth.
Avoid Stirring the Rice
When adding the long grain rice, it is important to press it down into the water rather than stirring it. Stirring can cause the rice to settle at the bottom in a thick layer, which increases the risk of scorching. Keeping the rice layered on top allows for even heat distribution.
Choose the Right Ground Beef Lean Ratio
Using lean ground beef, such as 90% lean or 93% lean, prevents the dish from becoming overly greasy. If you use a higher fat ratio like 80/20, you should drain the excess fat after browning the meat but before adding the water. This ensures the sauce adheres to the rice instead of sliding off.
Use a Consistent Rice Measuring Cup
For the best texture, use a standard measuring cup rather than a generic scoop. Pressure cookers rely on precise water-to-grain ratios to achieve the correct fluffiness. Too much water will lead to mushy rice, while too little may leave the grains undercooked.
Ingredient Substitutions for Dietary Needs
Gluten-Free Soy Sauce Alternatives
To make this recipe gluten-free, replace the standard soy sauce with tamari or coconut aminos. Tamari provides a flavor profile very similar to soy sauce but without the wheat. Coconut aminos are a soy-free alternative that is slightly sweeter and lower in sodium.
Low-Sugar Sweetener Options
If you want to reduce the sugar content, you can replace brown sugar with a monk fruit sweetener or erythritol. Ensure you use a brown-sugar flavored version to maintain the molasses notes. Adjust the quantity based on the sweetness intensity of the specific brand used.
Alternative Rice Varieties
While long grain white rice is recommended, you can use jasmine rice for a more fragrant aroma. If using basmati rice, you may need to reduce the water by a few tablespoons to prevent it from becoming too soft. Brown rice requires a significantly longer cooking time and more water.
Fresh Ginger instead of Ground
For a more pungent and bright flavor, substitute the ground ginger with freshly grated ginger root. Use approximately one teaspoon of fresh ginger for every quarter teaspoon of ground ginger. Fresh ginger adds a zestier profile that cuts through the richness of the beef.
Flavor and Nutrient Variations
Adding Mixed Frozen Vegetables
You can increase the nutritional value by stirring in a cup of frozen peas and carrots after the pressure cooking cycle. Since the rice and beef are already hot, the frozen vegetables will thaw and warm through during the sauce-mixing stage. This adds color and texture to the final meal.
Increasing the Heat with Gochugaru
To give the dish a more authentic Korean spicy profile, replace the chili peppers with gochugaru (Korean red chili flakes). Gochugaru provides a smoky, medium heat that complements the brown sugar glaze. Add one teaspoon for a mild kick or two for a stronger spice level.
Using Ground Turkey or Chicken
For a lighter protein option, substitute the ground beef with ground turkey or ground chicken. These meats are leaner and take on the flavors of the sauce very well. You may need to add an extra tablespoon of olive oil during the sauté phase as these meats are leaner than beef.
Adding Sautéed Mushrooms for Umami
Chopped shiitake or button mushrooms can be sautéed along with the beef to add a deeper earthy flavor. Mushrooms provide a meaty texture and boost the umami profile of the dish. Ensure the mushrooms are browned well before adding the water and rice.
Complementary Side Dish Ideas
Traditional Korean Kimchi
Serving this dish with a side of fermented Napa cabbage kimchi provides a sharp contrast to the sweet glaze. The acidity and probiotic nature of kimchi help balance the richness of the beef. It adds a crunchy texture and a spicy tang that cleanses the palate.
Sigeumchi Namul (Sesame Spinach)
Blanched spinach seasoned with toasted sesame oil and minced garlic is a classic accompaniment. This side dish introduces a fresh, green element to the plate. It is a light, nutrient-dense option that pairs well with the savory rice.
Kongnamul Muchim (Bean Sprout Salad)
Seasoned soybean sprouts offer a refreshing and crunchy contrast to the soft texture of the rice. These are typically dressed with sesame oil, salt, and green onions. They provide a clean taste that prevents the meal from feeling too heavy.
Musaengchae (Spicy Radish Salad)
Shredded Korean radish tossed in a spicy vinegar dressing adds a bright, zesty note to the meal. The crispness of the radish helps break up the density of the beef and rice. This salad is particularly good if you prefer a more acidic side dish.
Steamed Bok Choy or Broccoli
For a simple vegetable addition, steam some bok choy or broccoli florets. These vegetables can be drizzled with a small amount of the Korean sauce or kept plain. They provide essential vitamins and a visual pop of color to the serving.
Refreshing Cucumber Salad
A thinly sliced cucumber salad with rice vinegar and sesame seeds is a great cooling agent. This is especially useful if you have increased the amount of chili peppers in the recipe. The coolness of the cucumber balances the heat of the dish.
Storage and Preservation Guide
Cooling Process for Food Safety
Allow the beef and rice to cool to room temperature for about 30 minutes before sealing them in containers. Putting hot food directly into the refrigerator can raise the internal temperature of the fridge, potentially affecting other perishables. This gradual cooling also prevents excess condensation from forming inside the lid.
Optimal Airtight Container Selection
Store the leftovers in glass or BPA-free plastic airtight containers. Glass containers are preferable as they do not absorb odors or stains from the soy sauce. Ensuring a tight seal prevents the rice from drying out and keeps the flavors locked in.
Refrigeration Timelines and Limits
The cooked Korean beef and rice will remain safe and tasty in the refrigerator for 3 to 4 days. Ensure the containers are kept in the coldest part of the fridge, away from the door. If the food is not consumed within this timeframe, it should be discarded.
Reheating and Refreshing the Dish
Microwave Reheating with Moisture
When reheating in a microwave, add a splash of water or beef broth to the bowl before heating. Cover the bowl with a damp paper towel to trap the steam. This prevents the rice grains from becoming hard or rubbery during the process.
Stovetop Method for Better Texture
For a more consistent texture, reheat the dish in a non-stick skillet over medium-low heat. Stir frequently and add a tablespoon of water to loosen the rice. This method allows you to slightly crisp the beef again, enhancing the overall mouthfeel.
Instant Pot Steam Reheating
You can use the Instant Pot to reheat larger portions by adding a small amount of liquid to the bottom. Use the sauté function on low or the steam setting for a few minutes. This ensures the beef and rice are heated evenly throughout without drying out.
Freezing and Thawing Techniques
Individual Portion Freezing
Divide the beef and rice into single-serving portions before freezing. This allows you to thaw only what you need for one meal, reducing waste. Use freezer-safe containers and leave a small amount of headspace at the top for expansion.
Using Vacuum-Seal Freezer Bags
Vacuum-seal bags are the best option for preventing freezer burn. By removing all the air, you protect the rice and beef from oxidation and ice crystals. Squeeze out as much air as possible if using standard freezer zip-top bags.
Safe Thawing in the Refrigerator
Thaw the frozen portions in the refrigerator overnight rather than on the counter. This slow thawing process is safer and helps the rice retain more of its original moisture. Once thawed, reheat using the microwave or stovetop methods described above.
Troubleshooting Common Issues
Fixing Mushy Rice Texture
If the rice turns out too soft, it is usually due to excess water or overcooking. To fix this, you can stir-fry the cooked mixture in a pan over medium heat to evaporate the extra moisture. In the future, ensure you are using a precise measuring cup for the water.
Addressing Under-seasoned Beef
If the dish tastes bland, you can stir in an additional tablespoon of soy sauce or a pinch of salt after cooking. A squeeze of fresh lime juice can also brighten the flavors. Always taste the sauce before adding it to the pot to ensure the balance is correct.
Managing Excess Liquid After Cooking
If there is too much liquid in the pot after the quick release, turn on the sauté function for 2-3 minutes. Stir constantly until the excess water evaporates and the rice absorbs the remaining moisture. This ensures the sauce coats the ingredients rather than pooling at the bottom.
Frequently Asked Questions
Can I use brown rice instead of white rice?
Yes, but you must increase the cooking time to approximately 22-25 minutes on high pressure. Brown rice also requires a slightly higher water ratio, typically adding about 1/2 cup more water than white rice.
Is this dish suitable for meal prep?
This recipe is excellent for meal prep because it stores and reheats very well. The flavors often deepen after a day in the refrigerator, making it a convenient lunch option for the work week.
How do I make this less salty?
To reduce the saltiness, you can use low-sodium soy sauce or replace half of the soy sauce with water or unsalted beef broth. Adding extra vegetables like carrots or broccoli also helps balance the salt levels across the whole meal.
Can I add the sauce before pressure cooking?
No, adding the sauce before pressure cooking can lead to the sugar burning on the bottom of the pot. The sugar and cornstarch can caramelize too quickly, triggering the burn notice and ruining the texture of the rice.
Print
Instant Pot Korean Beef and Rice
- Total Time: 23 minutes
- Yield: 4 servings 1x
- Diet: General
Description
Instant Pot Korean Beef and Rice is an easy comfort meal that can quickly be prepared at the end of a work day.
Ingredients
- 2 tbsp olive oil
- 1 lb lean ground beef
- 5 cloves garlic pressed
- 1 tsp salt
- 1/2 tsp pepper
- 2 1/2 cups water
- 2 cups long grain rice
- 1/2 cup brown sugar
- 1 tsp corn starch
- 1/2 cup soy sauce
- 1/4 tsp ground ginger
- 1/2 tsp chili peppers
- 8 green onions chopped
- sesame seeds (optional)
Instructions
- Step: Add the olive oil to the Instant Pot and turn it to the Saute Less function for 7 minutes.
- Step: Add the ground beef to begin to brown and break it up while it is cooking.
- Step: After it starts to brown add the garlic, salt and pepper.
- Step: Continue breaking up the beef.
- Step: Once Pot turns off add the water and scrape any brown bits from the bottom of the Pot.
- Step: Sprinkle in the rice and press it down into the liquid. Do not stir.
- Step: Place the lid on the Instant Pot, turn the steam release handle to the sealing position and set the Instant Pot to Pressure Cook High for 6 minutes.
- Step: While the rice and beef are cooking prepare the sauce by dumping the brown sugar, corn starch, soy sauce ground ginger and chili peppers into a small mixing bowl. Stir to combine.
- Step: Cut up the green onions.
- Step: Once the Instant Pot is done cooking, immediately turn the steam release handle to the venting position and do a Quick Release.
- Step: Remove the lid and stir the contents well.
- Step: Pour in the sauce and stir until the meat and rice are coated.
- Step: Dump in the green onions and stir to combine.
- Step: Serve immediately and sprinkle on sesame seeds if desired.
Notes
This recipe was tested in an 8 quart Instant Pot Duo. Use more ground beef if desired.
- Prep Time: 7 minutes
- Cook Time: 16 minutes
- Category: Instant Pot
- Method: Pressure Cooking
- Cuisine: American
Nutrition
- Serving Size: 1 serving
- Calories: 586 kcal
- Sugar: 23 g
- Sodium: 2451 mg
- Fat: 24 g
- Saturated Fat: 7 g
- Unsaturated Fat: 15 g
- Trans Fat: 0 g
- Carbohydrates: 52 g
- Fiber: 3 g
- Protein: 39 g
- Cholesterol: 101 mg