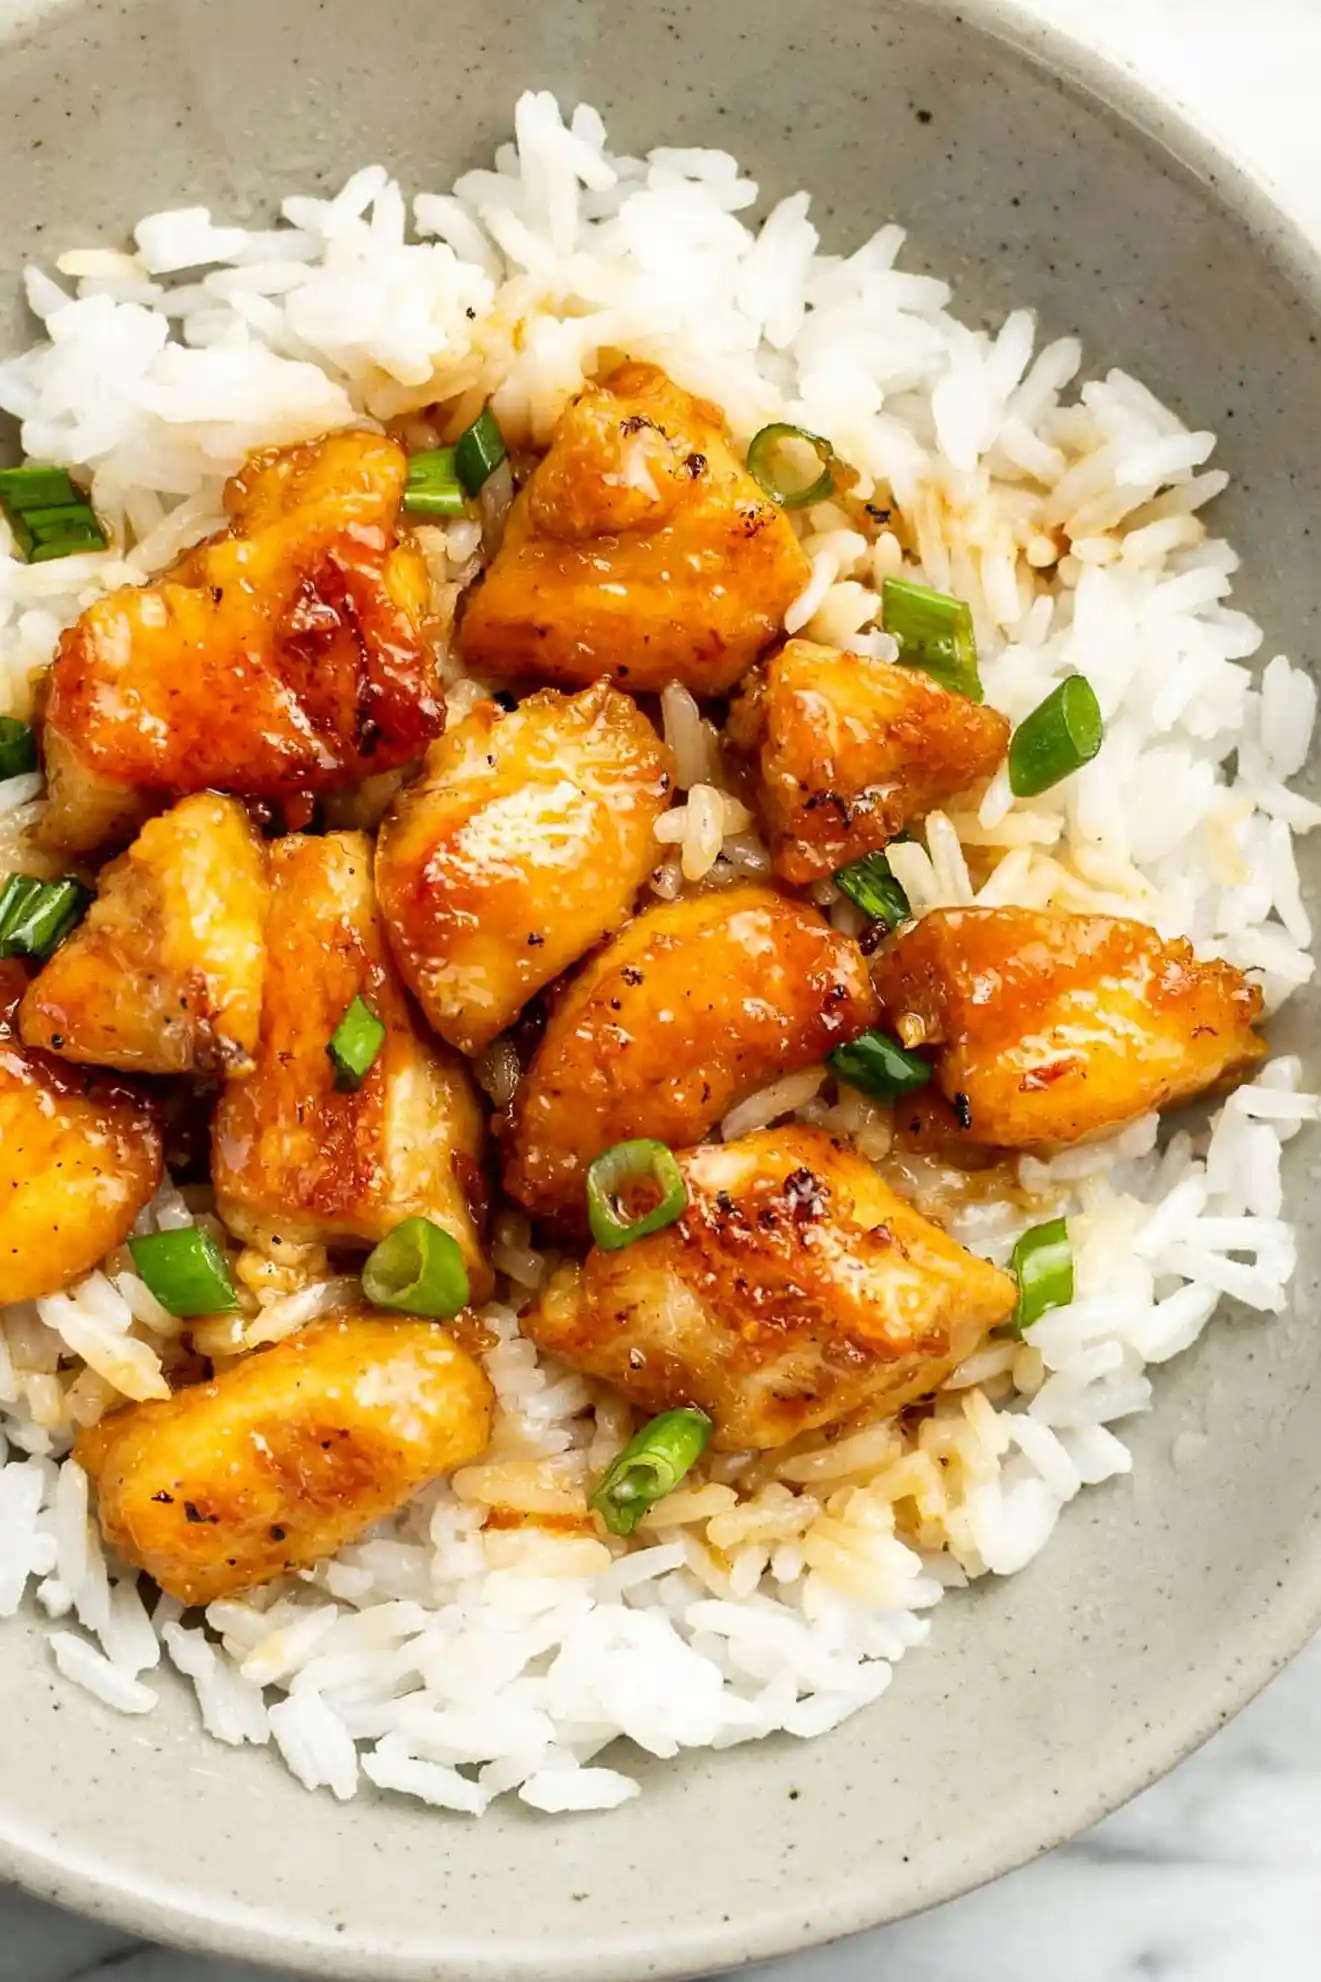
This quick honey chicken recipe features crispy pan-fried pieces tossed in a sweet and savory glaze. It is a healthy alternative to takeout that comes together in only 30 minutes. Perfect for a weeknight dinner, this dish balances sweetness with umami flavors.
List of ingredients
- 2 large chicken breasts – cut into bite-sized pieces.
- 2.5 tablespoons cornstarch – used for the crispy coating.
- 1/4 cup honey – provides the signature sweetness.
- 1/4 cup chicken broth – adds depth and forms the sauce base.
- 2 tablespoons soy sauce – provides savory umami flavor.
- 1/2 tablespoon apple cider vinegar – adds acidity to balance the honey.
- 1/4 teaspoon garlic powder – enhances the overall savory profile.
- 2 tablespoons olive oil or vegetable oil – for pan frying, plus more if needed.
- Chopped scallions – optional garnish for freshness.
step-by-step instructions
- Prepare Ingredients: Have all ingredients measured and ready. Cut the chicken into bite-size pieces.
- Coat the Chicken: Place the chicken pieces in a bowl and sprinkle cornstarch over them. Toss until every piece is evenly coated.
- Mix the Sauce: In a separate bowl, whisk together the honey, chicken broth, soy sauce, apple cider vinegar, and garlic powder.
- Heat the Pan: Add oil to a skillet over medium-high heat. Ensure the pan is very hot before adding the chicken.
- Sear the Chicken: Cook the chicken in two batches to avoid overcrowding. Brown each side for about 3-5 minutes. Transfer the seared chicken to a plate.
- Deglaze the Pan: Remove the skillet from the heat. Pour in the sauce mixture and scrape the browned bits from the bottom of the pan.
- Thicken the Glaze: Return the chicken to the pan. Reduce heat to medium and place the pan back on the burner.
- Final Cook: Simmer for a few minutes until the sauce thickens and the chicken is fully cooked. Spoon sauce over the pieces.
- Serve: Remove from heat and garnish with chopped scallions if desired.
Professional Cooking Techniques for Success
Prepare the Sauce Before Searing
The cooking process moves very quickly once the chicken hits the pan. By whisking the honey, broth, and soy sauce together beforehand, you prevent the chicken from overcooking while you scramble to mix the glaze.
Maintain High Heat for Better Searing
A very hot skillet is essential for creating a golden-brown crust. High heat ensures the cornstarch seals quickly, which prevents the chicken from steaming and keeps the interior juicy.
Cook Chicken in Small Batches
Overcrowding the pan lowers the temperature of the oil, which leads to soggy chicken. Searing the meat in two separate batches allows enough space for moisture to evaporate and for a proper crust to form.
Allow Chicken to Release Naturally
If the chicken sticks to the pan, do not force it off with a spatula. Wait a few more seconds, and the meat will release on its own once the searing process is complete.
Use Tongs for Efficient Flipping
Kitchen tongs provide better control than a fork or spoon. They allow you to flip the chicken pieces quickly and precisely without disturbing the cornstarch coating.
The Searing vs. Cooking Through Process
The initial sear is meant to develop color and flavor, not to cook the meat completely. The chicken finishes cooking during the final simmering stage when the sauce thickens, ensuring it remains tender.
Ingredient Modifications and Substitutions
Boost the Garlic Profile
For a stronger garlic flavor, you can increase the garlic powder amount or add two cloves of fresh minced garlic. Add fresh garlic to the pan for 30 seconds before pouring in the liquid sauce ingredients.
Add Spicy Heat to the Glaze
To introduce a spicy element, stir a pinch of red pepper flakes into the sauce mixture. Alternatively, drizzle a small amount of sriracha over the finished dish before serving.
Substitute Apple Cider Vinegar
Rice vinegar is an excellent alternative to apple cider vinegar for a more traditional Asian flavor. Both provide the necessary acidity to cut through the sweetness of the honey.
Use Chicken Thighs Instead of Breasts
Boneless, skinless chicken thighs are juicier and more forgiving than breasts. If using thighs, increase the searing time slightly as they contain more fat and may take longer to brown.
Alternative Sweeteners for Honey
Maple syrup can be used as a substitute for honey, though it will slightly change the flavor profile. Ensure the substitute is a liquid sweetener to maintain the consistency of the glaze.
Soy Sauce Variations
Low-sodium soy sauce can be used to reduce the salt content of the dish. If using a dark soy sauce, reduce the quantity slightly as it has a more intense color and flavor.
Recommended Side Dishes and Pairings
Pairing with Jasmine Rice
Fragrant jasmine rice is the ideal base for this dish. The fluffy texture of the rice absorbs the extra honey glaze, creating a balanced bite.
Using Rice Noodles
Thin rice noodles provide a lighter alternative to rice. Toss the noodles in a small amount of sesame oil before topping them with the honey chicken.
Serving with Udon Noodles
Thick, chewy udon noodles pair well with the sticky glaze. You can stir-fry the noodles separately with a bit of soy sauce before adding the chicken on top.
Adding Steamed Broccoli
Steamed broccoli florets add color and nutrition to the meal. The bitterness of the broccoli complements the sweetness of the honey glaze perfectly.
Combining with Vegetable Stir Fry
A mix of snap peas, carrots, and bell peppers provides a crunchy contrast to the tender chicken. Stir-fry the vegetables quickly in the same pan before adding the chicken back in.
Garnishing with Sesame Seeds
Toasted white or black sesame seeds add a nutty flavor and a professional look. Sprinkle them over the dish just before serving for a visual pop.
Adding Sliced Red Chilies
Freshly sliced red chilies provide a sharp heat and a bright red color. This is an excellent option for those who prefer a spicy kick to their sweet chicken.
Storage and Preservation Methods
Refrigeration Timeframes
Store leftover honey chicken in an airtight container in the refrigerator for 3 to 4 days. Ensure the chicken is cooled slightly before sealing the container to prevent excessive condensation.
Managing Texture Loss
The cornstarch coating will lose its crispiness over time as it absorbs moisture from the sauce. This is normal, but the flavor remains intact during storage.
Reheating in a Saucepan
To best preserve the quality, reheat the chicken slowly in a saucepan over low heat. Add a teaspoon of water or chicken broth to loosen the sauce as it warms through.
Freezing Considerations
Freezing is not recommended for this specific recipe. The honey-based sauce and the cornstarch coating do not hold up well during the freezing and thawing process.
Common Cooking Troubleshooting
Correcting a Thin Sauce
If the sauce is too thin after simmering, let it cook for another 2-3 minutes on medium heat. The sugars in the honey will continue to reduce and thicken the liquid.
Fixing a Sauce That is Too Thick
If the glaze becomes too sticky or thick, stir in a tablespoon of chicken broth or water. This will loosen the consistency without significantly altering the flavor.
Preventing Overcooked Chicken
Avoid cooking the chicken for too long once it has returned to the pan. As soon as the sauce is glossy and thick, remove the pan from the heat to keep the meat juicy.
Managing Oil Splatter
Searing chicken at high heat can cause oil to splatter. Use a splatter guard over your skillet to keep your stovetop clean while maintaining high temperatures.
Frequently Asked Questions
Can I use a different oil for frying?
Yes, any oil with a high smoke point works well, such as canola, peanut, or grapeseed oil. Olive oil is fine, but ensure you do not overheat it to the point of smoking.
How do I know when the chicken is fully cooked?
The chicken is done when it reaches an internal temperature of 165 degrees Fahrenheit. The pieces should be opaque throughout and firm to the touch.
Is it possible to make this in an air fryer?
You can air fry the cornstarch-coated chicken first at 400 degrees Fahrenheit for about 10-12 minutes. Then, toss the cooked pieces in the sauce heated in a separate pan.
Can I use fresh garlic instead of powder?
Yes, fresh minced garlic is a great substitute. Sauté the minced garlic in the oil for about 30 seconds before adding the sauce to prevent it from burning.
Print
Asian Style Honey Chicken
- Total Time: 30 minutes
- Yield: 4 servings 1x
- Diet: General
Description
This honey chicken recipe has irresistibly crispy pan-fried chicken that’s coated in a sweet and savory glaze. It’s ready in just 30 minutes and is healthier than takeout!
Ingredients
- 2 large chicken breasts
- 2.5 tablespoons cornstarch
- 1/4 cup honey
- 1/4 cup chicken broth
- 2 tablespoons soy sauce
- 1/2 tablespoon apple cider vinegar
- 1/4 teaspoon garlic powder
- 2 tablespoons olive oil or vegetable oil
- Chopped scallions
Instructions
- Prep Chicken: Cut the chicken into bite-size pieces. Add the chicken to a bowl and sprinkle the cornstarch over it. Toss until coated.
- Mix Sauce: To another bowl, add the honey, chicken broth, soy sauce, apple cider vinegar, and garlic powder. Whisk together.
- Sear Chicken: Add the oil to a skillet over medium-high heat. Let the pan get nice and hot. Cook the chicken until browned on two sides (about 3-5 min/side). Do two batches so as not to crowd the pan. Transfer the chicken to a plate once it’s seared.
- Deglaze Pan: Take the skillet off the heat and pour in the sauce from the bowl. Scrape up any browned bits from the bottom of the pan. Add the chicken back in. Reduce the heat to medium and return the pan to the burner.
- Finish: Let it cook for a few minutes until the sauce has thickened up a bit and the chicken is fully cooked through. Serve immediately with chopped scallions if desired.
Notes
If the chicken is sticking, wait a little longer and it will release when it’s nicely browned. Feel free to double the sauce ingredients if you prefer more sauce.
- Prep Time: 15 minutes
- Cook Time: 15 minutes
- Category: Main Course
- Method: Pan-frying
- Cuisine: Asian American
Nutrition
- Serving Size: 1 serving
- Calories: 281 kcal
- Sugar: 18 g
- Sodium: 690 mg
- Fat: 10 g
- Saturated Fat: 2 g
- Unsaturated Fat: 7 g
- Trans Fat: 0.01 g
- Carbohydrates: 23 g
- Fiber: 0.2 g
- Protein: 25 g
- Cholesterol: 73 mg