Prepare a hearty and flavorful meal using a pressure cooker for maximum convenience. These burrito bowls combine protein, grains, and vegetables in one pot for a simple cleanup.
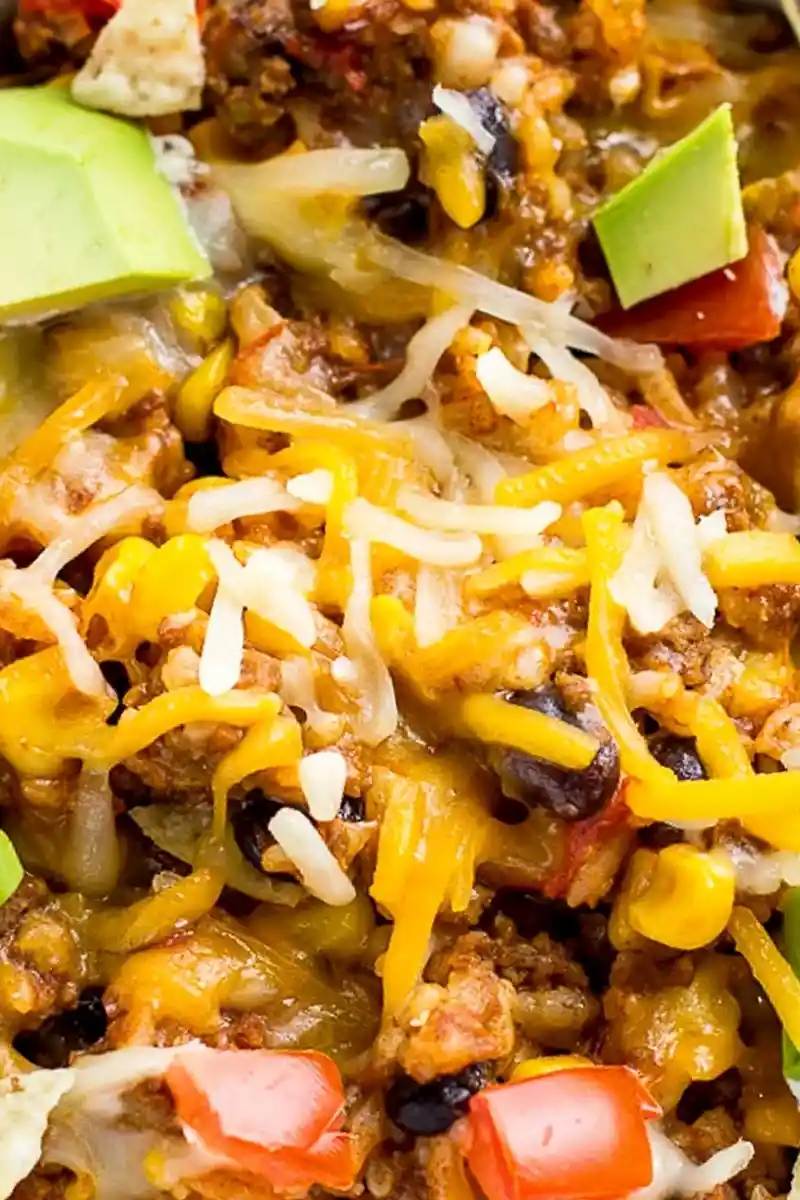
List of ingredients
- 2 Tablespoons olive oil – used for sautéing the meat and aromatics.
- 1 yellow onion, diced – provides a savory aromatic base.
- 1 pound ground beef – the primary protein source for the bowls.
- 1 packet taco seasoning – ensures a consistent and bold flavor profile.
- 1 1/2 cups chicken broth, divided – essential for simmering the beef and cooking the rice.
- 1 can black beans, drained and rinsed (15 ounces) – adds heartiness and plant-based protein.
- 1 can corn, drained (15 ounces) – introduces a touch of sweetness and texture.
- 1 jar medium salsa (16 ounces) – acts as the flavor base and thickening agent.
- 1 cup brown rice or jasmine rice – the filling grain base of the dish.
- Shredded cheese – for melting on top of the hot bowls.
- Diced tomatoes – adds a fresh, acidic contrast.
- Avocado – provides a creamy texture and healthy fats.
- Tortilla chips – used for added crunch and scooping.
- Sour cream – a cool topping to balance the spice.
step-by-step instructions
- Sauté the Oil: Press the ‘Saute’ button on your Instant Pot and add the olive oil. Allow the oil to heat up completely before adding any other ingredients.
- Brown the Beef: Add the ground beef to the pot and cook until it is fully browned. Be sure to drain any excess fat to ensure the final dish is not overly greasy.
- Cook the Aromatics: Stir in the diced yellow onions. Cook for 1-2 minutes until the onions become translucent and fragrant.
- Simmer the Meat: Add the taco seasoning and 1 cup of the chicken broth. Stir the mixture well and let it simmer for approximately 1 minute.
- Combine Vegetables: Stir in the drained black beans, drained corn, and the jar of salsa. Mix until all ingredients are evenly combined.
- Layer the Rice: Carefully spread the rice over the top of the beef and vegetable mixture. Do not stir the rice into the other ingredients, as this can cause a burn notice.
- Add Final Liquid: Pour the remaining 1/2 cup of chicken broth evenly over the rice layer. Ensure the rice is mostly covered by the liquid.
- Pressure Cook: Secure the lid and set the steam release valve to ‘Sealing’. Press the ‘Pressure Cook’ or ‘Manual’ button on high pressure for 15 minutes.
- Release Pressure: Once the cooking timer expires, carefully perform a quick pressure release to let the steam escape immediately.
- Assemble and Serve: Stir the rice into the mixture until fully integrated. Divide into bowls and top with shredded cheese, tomatoes, avocado slices, tortilla chips, and sour cream.
Protein and Grain Substitutions
Using Ground Turkey or Chicken
For a leaner version of this dish, you can substitute ground beef with ground turkey or ground chicken. Since these meats are lower in fat, you may need to add an extra teaspoon of olive oil during the sauté process. The taco seasoning works equally well with poultry to maintain the burrito flavor.
Replacing Rice with Quinoa
Quinoa is a nutrient-dense alternative that works well in the pressure cooker. Use the same quantity of quinoa as you would rice, but ensure it is rinsed thoroughly to remove any bitterness. The cook time remains similar, resulting in a protein-packed base for your bowl.
Converting to a Vegan Version
To make this recipe plant-based, replace the ground beef with crumbled tempeh or a meat substitute. Swap the chicken broth for a high-quality vegetable broth and use a dairy-free shredded cheese. Use a vegan sour cream alternative or a dollop of plain coconut yogurt for the topping.
Incorporating Cauliflower Rice
If you prefer a low-carb option, you can use cauliflower rice instead of traditional grains. Because cauliflower releases a lot of water, reduce the chicken broth by half. Add the cauliflower rice during the last few minutes of cooking or stir it in after the pressure release to avoid overcooking.
Enhancing Flavor and Heat
Adjusting Salsa Heat Levels
The flavor of the bowl depends heavily on the type of salsa used. For a mild version, choose a chunky tomato salsa; for more heat, opt for a habanero or chipotle-infused salsa. You can also mix a mild salsa with a small amount of hot sauce for a customized spice level.
Adding Fresh Spices
While a seasoning packet is convenient, adding fresh spices can deepen the flavor. Stir in half a teaspoon of ground cumin and a pinch of smoked paprika during the sauté stage. This adds an earthy, smoky depth that complements the ground beef.
Incorporating Diced Green Chiles
Adding a small can of diced green chiles along with the corn and beans provides a tangy, mild heat. This ingredient adds a traditional Southwestern profile to the dish. Ensure they are well-distributed in the mixture before sealing the lid.
Using Fresh Lime Juice
Squeezing fresh lime juice over the bowls just before serving brightens all the flavors. The acidity cuts through the richness of the beef and cheese. This is a simple way to make the dish taste more professional and vibrant.
Cooking Techniques for Better Results
Preventing the Burn Notice
The most common issue with Instant Pot rice dishes is the burn error. To avoid this, always layer the rice on top and do not stir it into the thick salsa and meat mixture. This ensures the rice cooks in the steam and broth without scorching the bottom of the pot.
Selecting the Best Rice Type
Jasmine rice provides a softer, slightly floral taste and cooks quickly. Brown rice offers a nuttier flavor and more fiber, though it may require a slightly firmer texture. Both work with the 15-minute high-pressure setting provided in this recipe.
Maximizing Meat Flavor
Do not rush the browning process of the ground beef. Letting the meat sear properly creates a Maillard reaction, which adds a deeper, caramelized flavor to the entire bowl. Sautéing the onions after the meat ensures they don’t burn while the beef is browning.
Properly Draining Canned Goods
Rinsing the black beans and draining the corn is crucial for texture and taste. Excess canning liquid can alter the salt levels and make the rice too mushy. Using a fine-mesh strainer ensures that only the solids enter the pot.
Serving and Presentation Suggestions
Creating a Build-Your-Own Bar
This recipe is ideal for families or parties when served as a build-your-own bar. Place the main beef and rice mixture in a large bowl and set out small containers of toppings. This allows guests to customize their bowls based on their dietary preferences and taste.
Low Carb Lettuce Wraps
For those avoiding grains, serve the beef and vegetable mixture inside large Romaine or butter lettuce leaves. This turns the bowl into a fresh wrap while maintaining all the savory flavors. It is a great way to incorporate more greens into the meal.
Pairing with Side Dishes
Complement the burrito bowls with a side of refried beans or a fresh garden salad. A side of sliced cucumbers with vinegar and salt provides a refreshing contrast to the heavy spices. Cornbread is another excellent pairing for a full Southwestern feast.
Garnishing with Fresh Herbs
Finely chopped fresh cilantro added at the end provides a burst of freshness and a professional look. A sprinkle of sliced green onions also adds a mild bite and a pop of color. These small additions elevate the dish from a simple meal to a gourmet experience.
Storage and Reheating Advice
Refrigeration Basics
Store the leftover burrito mixture in an airtight container in the refrigerator. It will remain fresh and safe to eat for up to four days. Ensure the container is completely cooled before sealing to prevent condensation from making the rice soggy.
Freezing the Main Mixture
The beef, bean, and rice mixture freezes exceptionally well. Portion the mixture into freezer-safe bags or containers, pressing out as much air as possible. These can be stored for up to three months and make for an easy freezer meal.
Microwave Reheating Instructions
To reheat, place a portion in a microwave-safe dish and add a tablespoon of water or broth. This creates steam that re-hydrates the rice and prevents the beef from drying out. Heat on medium-high in 1-minute intervals until steaming.
Storing Toppings Separately
Never store the toppings like avocado, sour cream, or chips with the main mixture. Keep them in their original containers or separate small jars. This prevents the chips from getting soggy and the avocado from browning during the reheating process.
Meal Prep and Efficiency
Portioning for the Week
Divide the completed recipe into six equal glass containers for a week of lunches. This helps with portion control and ensures you have a balanced meal ready to go. Leave a small space at the top of the container for added toppings.
Pre-Chopping Ingredients
Save time on cooking day by dicing the onion and prepping the tomatoes and avocado in advance. Store pre-cut onions in a sealed container and keep avocado in a cold environment. This reduces the active prep time to just a few minutes.
Managing Topping Freshness
To keep sliced avocados from oxidizing, toss them in a little lime juice before storing. Store diced tomatoes in a container with a paper towel at the bottom to absorb excess moisture. This keeps the toppings crisp and appetizing for several days.
Preserving Rice Texture
When meal prepping, slightly undercook the rice if you plan to reheat it multiple times. This prevents the grains from becoming mushy during the microwave process. Adding a splash of water during reheating will restore the perfect consistency.
Troubleshooting Common Issues
What to do if the Rice is Mushy
Mushy rice usually happens if there is too much liquid or if the rice was stirred in too early. To fix this, you can stir in a few tortilla chips to absorb some moisture. In the future, ensure the rice is kept in a strict layer on top of the other ingredients.
Handling Undercooked Rice
If the rice is still firm after the pressure release, add a small amount of broth and cook on the sauté setting for a few minutes. Keep the lid on to trap the steam. This will finish the cooking process without overcooking the meat.
Fixing a Dry Dish
If the final mixture seems too dry, stir in a few tablespoons of extra salsa or a splash of beef broth. This re-introduces moisture and enhances the flavor. Adding a dollop of extra sour cream upon serving also helps with the texture.
Adjusting Mild Flavors
If the dish tastes too bland, stir in a pinch of salt and a squeeze of lime juice. You can also add a dash of chili powder or cumin after cooking. Sometimes the saltiness of the taco seasoning varies by brand, so tasting at the end is key.
Frequently Asked Questions
Can I use a slow cooker instead?
Yes, but the timing and liquid ratios will change. You would need to cook the beef and onions first on the stove, then combine everything in the slow cooker for 4-6 hours on low. Be careful with the rice, as it may require a separate pot to avoid overcooking.
Do I have to drain the beef?
Draining the beef is highly recommended to avoid a greasy final product. Excess fat can pool at the bottom of the Instant Pot and may lead to a burn notice. It also makes the dish lighter and healthier.
Can I add fresh corn?
Fresh corn is a great substitute for canned corn. Use about 1.5 cups of fresh kernels cut from the cob. Since fresh corn contains more natural moisture than canned, you can slightly reduce the broth by a tablespoon.
Which rice is best for this recipe?
Jasmine rice is generally preferred for its texture and ability to absorb flavors. Brown rice is a healthier alternative but has a chewier consistency. Both work well with the 15-minute pressure cooking time.
Print
Instant Pot Beef Burrito Bowls
- Total Time: 40 minutes
- Yield: 6 servings 1x
- Diet: General
Description
These Burrito Bowls will show you, and your taste buds that you no longer need a tortilla to enjoy that burrito flavor.
Ingredients
- 2 Tablespoons olive oil
- 1 yellow onion, diced
- 1 pound ground beef
- 1 packet taco seasoning
- 1 1/2 cups chicken broth, divided
- 1 can (15 ounces) black beans, drained & rinsed
- 1 can (15 ounces) corn, drained
- 1 jar (16 ounces) medium salsa
- 1 cup brown rice or jasmine rice
- shredded cheese
- diced tomatoes
- avocado
- tortilla chips
- sour cream
Instructions
- Step: Press the “Saute” button, and add the oil.
- Step: Once the oil is hot, add the ground beef and cook until the ground beef is browned. Drain any excess fat.
- Step: Add the diced onions and cook for 1-2 minutes.
- Step: Add taco seasoning, and 1 cup of the chicken broth. Stir and simmer for 1 minute.
- Step: Stir in the beans, corn, and salsa; stir until combined.
- Step: Add the rice on top of the mixture, but DO NOT STIR.
- Step: Add remaining 1/2 cup of chicken broth over the rice.
- Step: Cover the pot and make sure the vent on the top of the cover is set to “Sealing”. Press the “Pressure Cook” or “Manual” button on HIGH pressure for 15 minutes. Close and lock the lid. When cooking time is complete, do a quick release of the pressure.
- Step: Stir everything together. Serve with shredded cheese, tomatoes, avocado slices, tortilla chips and sour cream.
Notes
You can use 1 pound of boneless chicken breasts instead of ground beef. Store leftovers in an airtight container in the refrigerator for up to 4 days, keeping toppings separate.
- Prep Time: 20 minutes
- Cook Time: 20 minutes
- Category: Main Course
- Method: Pressure Cooking
- Cuisine: American
Nutrition
- Serving Size: 1 serving
- Calories: 359 kcal
- Sugar: 2 g
- Sodium: 1085 mg
- Fat: 17 g
- Saturated Fat: 5 g
- Unsaturated Fat: 10 g
- Trans Fat: 1 g
- Carbohydrates: 30 g
- Fiber: 7 g
- Protein: 21 g
- Cholesterol: 53 mg