Boiling shrimp is a foundational culinary technique that yields succulent, tender results perfect for cold appetizers, salads, or main courses. This method relies on a rapid cook time and an immediate cooling process to ensure the texture remains delicate rather than rubbery. By following these precise steps, you will achieve restaurant-quality results every single time you prepare this protein.
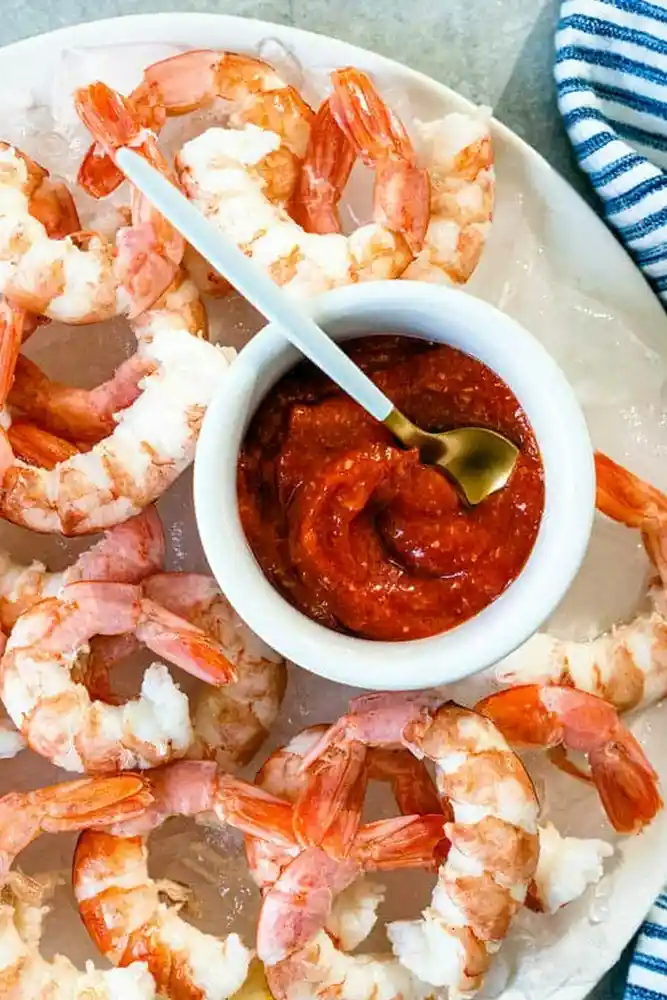
List of ingredients
- 1 pound large 16 to 20 count shrimp (tail-on and deveined)
- 1 teaspoon kosher salt, plus more for serving
- 1/2 lemon
- Lemon wedges, for serving
step-by-step instructions
- Step: Thaw the shrimp (place it in the refrigerator over night, or day of place it in a strainer and allow a steady stream of cold water to defrost it for about 15 minutes).
- Step: Bring 12 cups of water to boil with the kosher salt and lemon juice from the 1/2 lemon.
- Step: Prepare a bowl of ice water.
- Step: Add the shrimp and cook about 2 minutes (more or less time depending on size of shrimp), until bright pink and cooked through.
- Step: Remove the shrimp with a slotted spoon and place it directly into the ice water bath to stop the cooking.
- Step: Remove the shells from the shrimp, leaving the shell of the tail on. Discard the shells.
- Step: Pat the shrimp dry, and sprinkle it with additional kosher salt and few squirts from lemon wedges.
- Step: Store leftovers refrigerated for up to 3 days.
Refining Your Technique
Achieving the Ideal Texture
The secret to perfect boiled shrimp lies in the speed of the transition from heat to cold. If you allow the shrimp to sit in the hot water even thirty seconds too long, the proteins tighten significantly, resulting in a rubbery mouthfeel. Always have your ice bath prepared and placed directly next to the stove before you even turn on the burner to ensure the transition is near-instantaneous.
Selecting the Proper Shrimp Size
When selecting your shrimp at the market, look for the count per pound indicated on the label, such as 16 to 20. A lower number means larger individual shrimp, which are generally easier to manage during the boiling process and offer a more substantial appearance on a platter. If you choose smaller shrimp, reduce the boiling time to approximately 60 to 90 seconds to compensate for their faster cooking rate.
Maintaining Flavor Integrity
While the salt and lemon in the boiling water add a baseline of seasoning, the internal structure of the shrimp benefits from the shell being left on during the initial cook. The shell acts as a protective barrier, keeping the meat succulent and preventing the flavor from leaching entirely into the cooking liquid. Peeling after the ice bath allows you to enjoy the most flavorful, moist version of the shellfish.
Preparation and Storage Considerations
Maximizing Freshness
Once your shrimp are boiled, peeled, and dried, they can be stored in an airtight container in the refrigerator for up to three days. It is vital to ensure they are completely dry before sealing them away, as excess moisture can accelerate spoilage and degrade the quality of the flesh. If you prefer to keep them longer, you can move them to the freezer, though the texture may change slightly upon thawing.
Hosting for Gatherings
Boiled shrimp are an exceptional choice for hosting because they can be prepared up to 24 hours in advance without losing quality. Simply keep the cooked, chilled shrimp in the refrigerator until about 30 minutes before your guests arrive, then plate them on a chilled platter. They are perfectly safe to remain at room temperature for up to two hours, making them an ideal component for a buffet or grazing table.
Understanding Temperature Safety
While the shrimp can sit out safely for a couple of hours, always keep an eye on your indoor climate. In warmer environments or during outdoor summer events, it is best to place the platter of shrimp on a bed of ice to keep the meat firm and cool. Refresh the ice underneath as it melts to maintain the cold temperature throughout the duration of your party.
Troubleshooting Common Issues
Addressing Watery or Bland Results
If your shrimp seem to lack flavor, ensure you are using enough kosher salt in the boiling water. The salt acts as a brine that penetrates the exterior of the shrimp, elevating the inherent sea-salt notes of the protein. If the shrimp seem watery, it is usually a sign that they were not properly patted dry with paper towels after the ice bath, which prevents seasoning from adhering to the surface.
Fixing Overcooked Seafood
If you suspect you have left the shrimp in the water slightly too long, skip the extra seasoning and immediately serve them with a rich dipping sauce like a heavy aioli or a creamy lemon-herb dip. These fats can help mask the slight chewiness of overcooked shrimp by providing a luxurious mouthfeel that compensates for the loss of internal moisture. Moving forward, use a timer consistently to monitor the exact second they turn opaque.
FAQ
How can I verify the shrimp are fully cooked without a thermometer?
The most reliable visual indicator is the color change from translucent grey to a solid, opaque bright pink. Additionally, the shrimp will curl into a loose “C” shape when properly cooked, whereas a tight, circular “O” shape typically indicates that they have been left in the heat for too long.
Is it necessary to remove the vein before boiling?
While the dark line running along the back is technically edible, most home cooks prefer to remove it for both aesthetic reasons and for a cleaner flavor. If your store-bought shrimp come with the vein intact, you can easily remove it by making a shallow incision along the back with a paring knife and pulling the vein out with the tip of the blade before you begin the boiling process.
Can I reuse the boiling water for another batch?
You can certainly reuse the boiling water if you are cooking multiple pounds of shrimp in succession, though you may need to add a splash more lemon juice and a pinch of salt between batches. Ensure the water returns to a full, rolling boil before dropping in the next pound, and always replenish the ice in your cooling station to keep the temperature differential consistent.
Does the type of salt affect the outcome?
Kosher salt is preferred for this recipe because of its large, flaky structure which dissolves cleanly and provides a balanced salinity without the harsh mineral aftertaste sometimes found in fine table salt. If you must use table salt, reduce the measurement by half, as it is much denser and more potent in terms of sodium content per teaspoon.
What are the benefits of using a slotted spoon?
A slotted spoon allows you to lift the shrimp out of the boiling liquid while letting the water drain away immediately. This prevents a large volume of hot, boiling water from being transferred into your ice bath, which would prematurely melt your ice and raise the temperature of your cooling water too quickly, thus defeating the purpose of the shock-cooling step.
Print
How to Boil Shrimp
- Total Time: PT15M
- Yield: 1 pound 1x
- Diet: Pescatarian, Gluten-free, Dairy-free
Description
Wondering how to boil shrimp? Boiling up a batch is perfect for shrimp cocktail and comes out tender and juicy every time.
Ingredients
- 1 pound large 16 to 20 count shrimp (tail-on and deveined)
- 1 teaspoon kosher salt, plus more for serving
- 1/2 lemon
- Lemon wedges, for serving
Instructions
- Step: Thaw the shrimp (place it in the refrigerator over night, or day of place it in a strainer and allow a steady stream of cold water to defrost it for about 15 minutes).
- Step: Bring 12 cups of water to boil with the kosher salt and lemon juice from the 1/2 lemon.
- Step: Prepare a bowl of ice water.
- Step: Add the shrimp and cook about 2 minutes (more or less time depending on size of shrimp), until bright pink and cooked through.
- Step: Remove the shrimp with a slotted spoon and place it directly into the ice water bath to stop the cooking.
- Step: Remove the shells from the shrimp, leaving the shell of the tail on. Discard the shells.
- Step: Pat the shrimp dry, and sprinkle it with additional kosher salt and few squirts from lemon wedges.
- Step: Store leftovers refrigerated for up to 3 days.
Notes
Make-ahead for parties: You can boil shrimp up to 24 hours before serving. Keep them chilled until about 30 minutes before your event, then arrange on a platter. Boiled shrimp can safely sit at room temperature for up to 2 hours.
- Prep Time: PT10M
- Cook Time: PT5M
- Category: Seafood
- Method: Boiled
- Cuisine: American
Nutrition
- Serving Size: 4 ounces
- Calories: 120 kcal
- Sugar: 0 g
- Sodium: 350 mg
- Fat: 2 g
- Saturated Fat: 0.5 g
- Unsaturated Fat: 1 g
- Trans Fat: 0 g
- Carbohydrates: 1 g
- Fiber: 0 g
- Protein: 24 g
- Cholesterol: 175 mg