This quick dinner recipe delivers tender chicken strips glazed in a sticky honey garlic sauce. It is an ideal choice for busy weeknights when you need a high-protein meal in under 20 minutes.
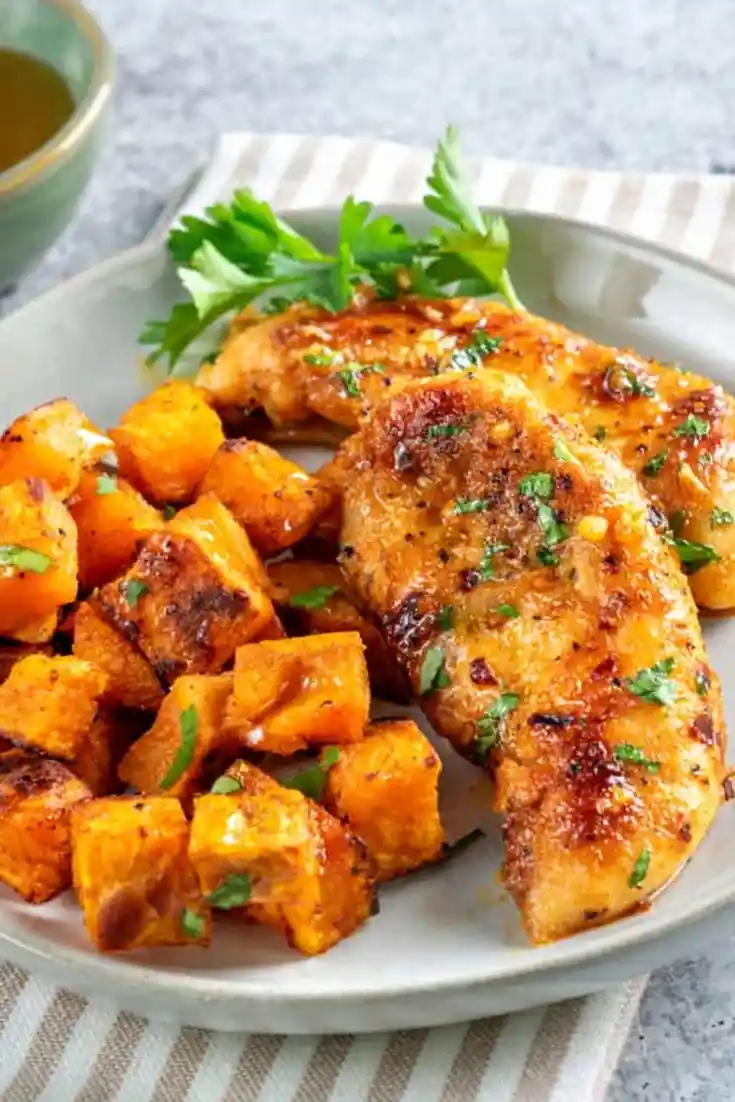
List of ingredients
- 1 pound chicken tenderloins (approximately 8 strips) – use fresh or fully thawed tenders.
- 3-4 tablespoons olive oil, divided – used for both marinating and searing.
- 3/4 teaspoon salt – enhances the natural flavor of the meat.
- 1/2 teaspoon black pepper – provides a subtle woody heat.
- 3/4 teaspoon garlic powder – adds a base layer of savory flavor.
- 3/4 teaspoon onion powder – complements the garlic for depth.
- 3/4 teaspoon paprika – gives the chicken a rich golden color.
- 1/2 teaspoon red pepper flakes (optional) – add this for a touch of spiciness.
- 2 teaspoons minced garlic – use fresh cloves for the most intense flavor.
- 1 tablespoon honey – creates the sweet glaze and helps the sauce thicken.
- 1 tablespoon chopped fresh parsley – adds a bright, herbal finish.
- 1/2 tablespoon butter (optional) – adds richness and a glossy sheen to the sauce.
step-by-step instructions
- Prepare the chicken: Remove the white tendon from each tenderloin by gripping it with a paper towel and pulling it straight out. You can press the tendon against the tines of a fork to get a better grip during removal.
- Season and marinate: Place the chicken in a shallow glass or non-plastic dish. Add half of the olive oil and all the seasonings, mixing thoroughly until every piece is evenly coated. Let it marinate for 15 minutes if time permits, or proceed immediately to cooking.
- Sear the meat: Heat a large skillet over medium heat and add the remaining olive oil. Once the oil shimmers, add the chicken pieces and cook for 4-5 minutes per side until a crispy golden-brown crust forms.
- Glaze and finish: Reduce the heat to low and stir in the honey, minced garlic, and fresh parsley. If using butter, add it now and stir constantly for about 2 minutes until the chicken reaches an internal temperature of 165°F.
Professional Searing Techniques
The Water Drop Test
To ensure your skillet is hot enough before adding oil, drop a small bead of water into the dry pan. If the water sizzles and dances across the surface immediately, the pan is ready. If the water simply sits or evaporates slowly, continue heating the pan for another minute.
Monitoring Oil Shimmer
Watch the olive oil closely after pouring it into the preheated skillet. The oil is ready for the chicken when it begins to shimmer and move fluidly across the pan. Adding meat to cold oil results in sticking and a lack of browning.
Avoiding Pan Overcrowding
Place the chicken tenders in the pan with enough space between each piece to allow steam to escape. Overcrowding the skillet lowers the surface temperature and causes the meat to steam rather than sear. Cook in two batches if your skillet is too small for all eight tenders.
Ensuring Proper Sizzle
Listen for a loud sizzle the moment the chicken hits the oil. If the pan remains quiet, the oil temperature has dropped too low, and you should wait before adding more pieces. A strong sizzle is the key to locking in juices and creating a crispy exterior.
Using the Right Pan Material
A stainless steel or cast iron skillet is ideal for this recipe because they hold heat exceptionally well. Non-stick pans work but may not produce as deep of a brown crust. Regardless of the material, ensure the pan is large enough to allow for easy flipping.
Ingredient Modifications and Swaps
Using Maple Syrup as a Honey Alternative
If honey is unavailable, pure maple syrup is an excellent substitute that provides a similar thickness and sweetness. The flavor profile will shift slightly toward a woody sweetness, which pairs well with the paprika. Use the same one-tablespoon measurement as the honey.
Swapping Olive Oil for Avocado Oil
For those preferring a higher smoke point, avocado oil is a great replacement for olive oil. It has a neutral flavor that allows the garlic and honey to stand out more prominently. This is particularly useful if you prefer to sear the chicken at a slightly higher temperature.
Substituting Fresh Parsley with Dried Herbs
When fresh parsley is not on hand, you can use dried parsley, but reduce the quantity to one teaspoon. Dried herbs are more concentrated than fresh ones and can become bitter if overused. Add the dried parsley during the searing process rather than at the very end.
Adjusting the Red Pepper Flakes for Heat
The red pepper flakes are optional and can be scaled based on your spice preference. For a mild heat, use a pinch; for a spicy kick, increase the amount to a full teaspoon. Ensure the flakes are mixed into the initial marinade for even distribution.
Using Garlic Powder Instead of Fresh Garlic
If you cannot use fresh minced garlic, you can increase the amount of garlic powder in the marinade. However, fresh garlic provides a pungent aroma and depth that powder cannot fully replicate. Avoid adding powder at the very end, as it may clump in the honey glaze.
Pairing and Presentation Options
Serving with Steamed Jasmine Rice
Jasmine rice is a classic accompaniment because its fragrant, fluffy texture absorbs the honey garlic glaze. Steam the rice while the chicken is searing to ensure both are hot. Serve the tenders directly on top of a mound of rice to keep the meat moist.
Pairing with Roasted Root Vegetables
Roasted carrots, parsnips, or sweet potatoes provide a hearty contrast to the sweet glaze of the chicken. Toss the vegetables in olive oil and salt, then roast at 400°F for 20-25 minutes. The earthiness of the roasted vegetables balances the intensity of the garlic.
Creating a Low Carb Meal with Cauliflower Rice
For a lower-calorie alternative, sauté cauliflower rice with a pinch of salt and pepper. This option maintains the aesthetic of a rice bowl without the carbohydrates. The mild flavor of cauliflower complements the savory chicken without overpowering it.
Adding a Fresh Side Salad
A crisp green salad with a light lemon vinaigrette cuts through the richness of the honey and butter. Use mixed greens, sliced cucumbers, and cherry tomatoes for a refreshing contrast. The acidity of the lemon helps cleanse the palate between bites of sweet chicken.
Using Quinoa for Extra Protein
Quinoa is a nutrient-dense alternative to rice that adds a slight nutty flavor to the dish. Cook the quinoa in vegetable broth instead of water for added depth. This pairing makes the meal more filling and increases the overall protein content.
Storage and Freshness Guidelines
Proper Refrigeration Containers
Store leftover chicken in an airtight glass container to prevent the meat from absorbing other fridge odors. Glass is preferred over plastic as it does not stain from the honey glaze and keeps the food cooler. Ensure the chicken is completely cooled before sealing the lid to avoid condensation.
Maximum Storage Duration
Cooked honey garlic chicken tenders stay fresh in the refrigerator for up to three to four days. Beyond this window, the texture of the meat may begin to degrade, and the honey glaze may separate. Always check for a fresh aroma before consuming leftovers.
Freezing for Long Term Use
These tenders can be frozen for up to two months if wrapped tightly in foil and placed in a freezer bag. Freezing is a great way to handle bulk meal prep for future weeks. Label the bag with the date of preparation to track freshness.
Thawing Methods for Frozen Tenders
The safest way to thaw frozen chicken is to move it from the freezer to the refrigerator 24 hours before eating. Avoid thawing at room temperature to prevent bacterial growth. Alternatively, use the defrost setting on a microwave for a quicker but less ideal result.
Reheating for Optimal Texture
Using the Oven for Crispy Results
To regain the crispy exterior, reheat the chicken in an oven preheated to 350°F. Place the tenders on a baking sheet and heat for 5-10 minutes until warmed through. This method prevents the honey glaze from becoming too runny.
Quick Microwave Reheating Tips
If using a microwave, place the chicken on a microwave-safe plate and cover it with a damp paper towel. Heat in 30-second intervals to avoid overcooking the meat, which can make it rubbery. This is the fastest method but may result in a softer crust.
Stovetop Reheating Method
Place the tenders in a skillet over low heat with a teaspoon of water or butter. Cover the pan with a lid for 2-3 minutes to steam the meat while heating. This keeps the chicken juicy while gently warming the glaze.
Preventing Overcooking During Reheat
The goal of reheating is to warm the meat without cooking it further. Remove the chicken from the heat source as soon as it is warm to the touch. Overheating chicken tenderloins quickly leads to a dry, stringy texture.
Preparation and Meal Planning
Effective Tendon Removal Techniques
Removing the tendon is essential for a tender eating experience. By using a fork to anchor the end of the tendon and a paper towel for grip, you can pull the connective tissue out in one clean motion. This prevents the chicken from curling up during the searing process.
Marinating for Enhanced Flavor
While this recipe can be cooked immediately, a 15-20 minute marinade allows the salt and spices to penetrate deeper into the meat. Use a shallow dish to ensure the chicken is fully submerged in the oil and spice mixture. This step enhances the overall savoriness of the final dish.
Pre-Cutting Tenders into Cubes
If you prefer a faster cook time or are preparing the chicken for a salad, cut the tenders into 1-inch cubes before marinating. Cubed chicken sears faster and provides more surface area for the honey garlic glaze to cling to. Adjust the cooking time to 3 minutes per side.
Batch Preparing for the Week
You can prepare multiple pounds of chicken using this method to save time during the week. Once cooked and cooled, divide the tenders into individual portion containers with their respective side dishes. This makes the recipe an excellent option for healthy office lunches.
Troubleshooting Common Cooking Errors
Fixing Dry or Overcooked Meat
If the chicken becomes dry, it is usually due to overcooking or using too high a heat. To rescue slightly dry meat, simmer it in a small amount of chicken broth or extra honey glaze for one minute. This adds moisture back into the fibers of the meat.
Preventing Garlic from Burning
Garlic burns quickly and becomes bitter if exposed to high heat for too long. Always reduce the skillet temperature to low before adding the minced garlic. Stir the garlic constantly for the final two minutes of cooking to ensure it softens without browning.
Handling a Sauce that is Too Thick
If the honey glaze becomes too thick or sticky, add a teaspoon of water or lemon juice to the pan. Stir the liquid in quickly over low heat to loosen the sauce. This creates a smoother consistency that coats the chicken more evenly.
Correcting a Lack of Browning
If the chicken looks pale after several minutes, your pan temperature is too low. Increase the heat slightly and avoid moving the chicken too often. Let the meat sit undisturbed for 4 minutes to allow the Maillard reaction to create a brown crust.
Frequently Asked Questions
Can I use chicken breast instead?
Yes, you can use chicken breasts, but you must slice them into thin strips to mimic the size of tenderloins. Be careful not to overcook them, as breast meat dries out faster than tenderloins. Use a meat thermometer to ensure they hit exactly 165°F.
How do I store leftovers?
Store leftovers in an airtight container in the refrigerator for up to four days. To keep them fresh, ensure the chicken is completely cooled before sealing the container. This prevents moisture buildup that can make the crust soggy.
Is this recipe keto-friendly?
The recipe as written is not keto-friendly due to the honey. To make it keto, replace the honey with a sugar-free maple syrup or a keto-approved sweetener. Keep the garlic and spices as they are to maintain the flavor profile.
Can I make this in an air fryer?
You can air fry the seasoned tenders at 380°F for about 8-10 minutes, flipping halfway through. However, the honey glaze should be applied at the very end or tossed in a bowl after cooking to prevent the honey from burning on the air fryer basket.
What is the best way to remove the tendon?
The most effective way is to use a fork to hold the end of the tendon and pull it out with a paper towel. This provides the necessary grip to slide the tendon out without tearing the meat. It ensures every bite is tender and free of chewy textures.
Can I use dried garlic instead of fresh?
You can use garlic powder, but fresh minced garlic is highly recommended for the glaze. Fresh garlic provides a pungent, aromatic quality that defines this dish. If using powder, add it to the initial seasoning mix rather than the final glaze.
Print
Sweet and Savory Honey Garlic Chicken Tenders
- Total Time: 15 minutes
- Yield: 4 servings 1x
- Diet: General
Description
This Honey Garlic Chicken Tenders recipe is sweet and spicy, loaded with flavor, and only takes about 15 minutes to make. Chicken tenderloins are pan-seared in olive oil, and finished with honey, fresh garlic and parsley, for an easy dinner that’s as healthy as it is delicious!
Ingredients
- 1 pound chicken tenderloins, about 8 tenders
- 3–4 tablespoons olive oil, divided
- 3/4 teaspoon salt
- 1/2 teaspoon black pepper
- 3/4 teaspoon garlic powder
- 3/4 teaspoon onion powder
- 3/4 teaspoon paprika
- 1/2 teaspoon red pepper flakes, optional
- 2 teaspoons minced garlic
- 1 tablespoon honey
- 1 tablespoon chopped fresh parsley
- 1/2 tablespoon butter, optional
Instructions
- Remove tendon: Remove tendon from each tenderloin by grabbing it with a paper towel and pulling it straight out.
- Season: Place full chicken tenderloins in a shallow glass or non-plastic dish. To the chicken add half the olive oil and all the seasonings. Mix until all sides of the chicken are coated.
- Sear: Pre-heat a large skillet over medium, then add remaining olive oil. When the olive oil is warm, place each piece of chicken into the pan and cook for 4-5 minutes per side until crispy.
- Glaze: Reduce heat, then add honey, garlic and parsley, and optional butter. Mix around to coat the chicken and cook for 2 minutes or until the meat reaches an internal temperature of 165°F.
Notes
Pre-heat the skillet before adding oil. Reduce the heat to low before adding garlic to prevent burning. Use a meat thermometer to verify chicken reaches 165°F. Let the chicken tenderloins rest a few minutes after cooking to redistribute juices.
- Prep Time: 5 minutes
- Cook Time: 10 minutes
- Category: Main Dishes
- Method: Pan-searing
- Cuisine: American
Nutrition
- Serving Size: 2 chicken tenders
- Calories: 280 kcal
- Sugar: 5 g
- Sodium: 680 mg
- Fat: 14 g
- Saturated Fat: 3 g
- Unsaturated Fat: 11 g
- Trans Fat: 0 g
- Carbohydrates: 8 g
- Fiber: 1 g
- Protein: 28 g
- Cholesterol: 85 mg