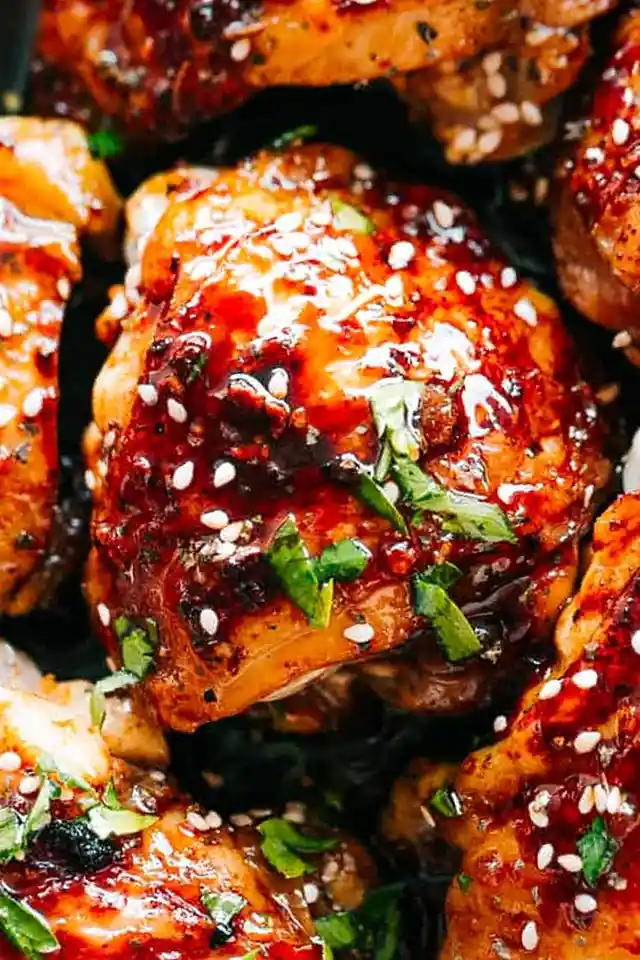
This recipe utilizes the Instant Pot to create tender, bone-in chicken thighs with a thick, savory glaze. It is a time-efficient method for achieving fall-off-the-bone meat with a balanced sweet and salty profile.
List of ingredients
- 6 bone-in skin-on chicken thighs – provides maximum juiciness and flavor.
- 1 tablespoon paprika – adds smoky notes and a rich color.
- fresh ground black pepper – added to taste for a mild heat.
- 2 tablespoons olive oil (divided) – used for searing and in the sauce.
- 1 tablespoon white vinegar – balances the sugar with acidity.
- 1 tablespoon brown sugar – helps with caramelization.
- 1/4 cup honey – provides thickness and sweetness.
- 1/3 cup low sodium soy sauce – adds the primary salty umami base.
- 1/2 tablespoon Worcestershire sauce – enhances the savory depth.
- 1 tablespoon hot chili sauce (Sriracha) – adjust amount based on heat preference.
- 3 cloves garlic (minced) – provides aromatic depth.
- 1/8 teaspoon ground ginger – adds a warm, spicy undertone.
- 1 tablespoon toasted sesame seeds – used for final garnish.
- chopped fresh cilantro – optional garnish for freshness.
step-by-step instructions
- Prepare the pot: Set the Instant Pot to Sauté mode and heat 1 tablespoon of olive oil.
- Brown the chicken: Season the thighs with paprika and black pepper. Add them to the pot in batches of about 3, skin side down, browning for 2 minutes on each side before removing.
- Whisk the sauce: Combine 1 tablespoon of olive oil, white vinegar, brown sugar, honey, soy sauce, Worcestershire sauce, hot chili sauce, minced garlic, and ground ginger in a bowl.
- Combine ingredients: Place the browned chicken thighs evenly at the bottom of the Instant Pot. Pour the sauce over the meat and stir gently to ensure every piece is fully coated.
- Pressure cook: Lock the lid and set to HIGH pressure or Poultry Mode for 20 minutes. Once finished, allow the pressure to release naturally for 5 minutes.
- Thicken the glaze: Optionally, remove 1/4 cup of the cooking liquid and whisk in 1 tablespoon of cornstarch. Set the pot back to Sauté mode and stir the mixture in for 1 to 2 minutes until the sauce thickens.
- Final serve: Transfer the chicken to a plate, pour the thickened sauce over the top, and garnish with toasted sesame seeds and fresh cilantro.
Pro Tips for Better Results
Avoid Crowding the Pot During Searing
Brown the chicken in batches of three to ensure the pot remains hot. Overcrowding the pot lowers the temperature, which causes the chicken to release moisture and steam rather than sear, preventing a golden-brown crust.
Use a Cornstarch Slurry for Smoothness
Always mix cornstarch with a small amount of cold liquid before adding it to the hot sauce. Adding dry cornstarch directly into the pot can lead to clumps that are difficult to whisk out, resulting in an uneven texture.
Maintain Juicy Meat with Natural Release
Allowing the pot to release pressure naturally for at least 5 minutes prevents the meat from toughening. A sudden drop in pressure can cause the juices to be forced out of the meat, leaving the chicken dry.
Ingredient Alternatives
Replacing Honey for Different Sweeteners
Maple syrup can be used as a 1:1 replacement for honey to provide a slightly more woody sweetness. Agave nectar is another option, though it is thinner and may require an extra minute of sautéing to reach the desired stickiness.
Soy Sauce Alternatives for Dietary Needs
Tamari is a suitable replacement for soy sauce for those avoiding wheat, as it is naturally gluten-free. Coconut aminos can also be used for a lower-sodium, soy-free alternative, though they are slightly sweeter and less salty.
Substituting Vinegar for Different Acidity
Apple cider vinegar provides a fruitier tang compared to white vinegar. Rice vinegar is a more traditional choice for Asian-inspired glazes, offering a milder acidity that blends seamlessly with honey and ginger.
Flavor Variations and Tweaks
Adding Citrus Notes for Brightness
Whisk the zest and juice of one medium orange into the sauce mixture before cooking. The citric acid cuts through the richness of the chicken thighs and adds a bright, citrusy layer to the sticky glaze.
Increasing the Heat Level
For a spicier dish, increase the Sriracha to two tablespoons or add a teaspoon of crushed red pepper flakes. Adding fresh sliced jalapeños during the pressure cooking phase also infuses the sauce with a sharper heat.
Using Boneless Chicken Thighs
Boneless thighs work well but require a shorter cooking time to avoid overcooking. Reduce the high-pressure cooking time to 12-15 minutes depending on the thickness of the meat.
Recommended Serving Pairings
Pairing with Grains
Serve the chicken over steamed Jasmine rice or brown rice to absorb the extra sauce. Quinoa or cauliflower rice are also effective options for those seeking a lower-carb or gluten-free base.
Adding Fresh Vegetables
Steamed bok choy, sautéed snap peas, or roasted broccoli complement the sweet and savory flavors of the glaze. These vegetables provide a crisp texture that balances the tenderness of the slow-cooked meat.
Noodle Based Accompaniments
Soba noodles or rice noodles tossed in a light sesame oil and soy dressing pair well with this dish. The noodles act as a neutral base that allows the bold flavors of the sticky sauce to stand out.
Storage and Reheating Guidelines
Storing Leftovers in the Refrigerator
Place the cooked chicken and sauce in an airtight container and refrigerate for 2 to 3 days. Keep the sauce and chicken together so the meat remains moist during storage.
Best Reheating Methods
Reheat the chicken in an oven at 350 degrees Fahrenheit for 10-15 minutes to maintain the skin’s texture. Alternatively, use a microwave on medium power, adding a splash of water to prevent the sauce from becoming too tacky.
Freezing the Cooked Chicken
Cooked sticky chicken can be frozen for up to three months in a vacuum-sealed bag or freezer-safe container. Thaw completely in the refrigerator overnight before reheating in the oven or on a stovetop.
Planning and Preparation
Make-Ahead Strategies
Prepare the sauce mixture up to 24 hours in advance and store it in a sealed jar in the refrigerator. This reduces the active prep time on the day of cooking and allows the garlic and ginger flavors to meld.
Batch Cooking for Meal Prep
Double the recipe by using a larger Instant Pot or cooking in two batches. Portion the chicken and sauce into individual containers for a week of high-protein lunches.
Solving Common Cooking Issues
Handling a Thin Sauce
If the sauce remains too watery after the initial thickening attempt, increase the cornstarch slurry. Add one teaspoon of cornstarch to a tablespoon of water and stir it into the boiling sauce on sauté mode for another 60 seconds.
Preventing the Burn Notice
To avoid the ‘Burn’ error on the Instant Pot, ensure the pot is deglazed after browning the chicken. Stir the sauce well to make sure no browned bits are stuck to the bottom before locking the lid.
Fixing Overcooked Chicken
If the chicken becomes too dry due to overcooking, simmer it in the thickened sauce for 2-3 minutes on low heat. The sauce helps rehydrate the exterior of the meat and adds back moisture.
Common Questions and Answers
Can I use chicken breasts instead of thighs?
Yes, you can use breasts, but the cooking time must be reduced to 10 minutes on high pressure to prevent them from becoming dry. Breast meat lacks the fat of thighs, so it may not be as tender.
Do I have to brown the chicken first?
While not strictly necessary for safety, browning is essential for flavor. It creates a caramelized crust that adds depth to the final dish and prevents the chicken from looking pale.
Can I add vegetables directly to the pot?
Yes, add hardy vegetables like carrots or bell peppers before pressure cooking. Avoid adding delicate greens like spinach or peas until after the pressure has been released and the pot is on sauté mode.
Is the skin edible after pressure cooking?
The skin will be soft after pressure cooking. To regain a crisp texture, place the cooked thighs under a broiler for 2-3 minutes before adding the final sauce glaze.
Print
Instant Pot Sticky Chicken
- Total Time: 35 minutes
- Yield: 6 servings 1x
- Diet: General
Description
Tender, deliciously juicy, fall-off-the-bone sticky chicken prepared in the Instant Pot with a sweet and savory sticky sauce.
Ingredients
- 6 bone-in skin-on chicken thighs
- 1 tablespoon paprika
- fresh ground black pepper, to taste
- 2 tablespoons olive oil, divided
- 1 tablespoon white vinegar
- 1 tablespoon brown sugar
- 1/4 cup honey
- 1/3 cup low sodium soy sauce
- 1/2 tablespoon Worcestershire sauce
- 1 tablespoon hot chili sauce
- 3 cloves garlic, minced
- 1/8 teaspoon ground ginger
- 1 tablespoon toasted sesame seeds
- chopped fresh cilantro, optional
- 1 tablespoon cornstarch
Instructions
- Step: Set the Instant Pot to Sauté mode and heat 1 tablespoon olive oil.
- Step: Season the chicken thighs with paprika and ground black pepper, and add the chicken, about 3 chicken thighs at a time, skin side down, to the Instant Pot. Brown the thighs on all sides, about 2 minutes on each side. Repeat with the remaining chicken thighs.
- Step: Prepare the sauce by whisking together 1 tablespoon of olive oil, vinegar, brown sugar, honey, soy sauce, Worcestershire sauce, hot sauce, minced garlic, and ground ginger.
- Step: Arrange the browned chicken evenly on the bottom of the Instant Pot. Pour the prepared sticky sauce over the chicken thighs and stir so it is coated on all sides.
- Step: Lock the lid and pressure cook on HIGH (or Poultry Mode) for 20 minutes. Turn off the pot and allow it to release the pressure for about 5 minutes. Transfer the chicken thighs to a serving plate.
- Step: To thicken the sauce (optional), scoop out 1/4 cup of the liquid and whisk a tablespoon of cornstarch in it. Set the Instant Pot to sauté mode and stir the cornstarch mixture into the sauce; cook for 1 to 2 minutes or until thickened.
- Step: Serve the sauce separately or pour it over the chicken. Sprinkle the chicken with sesame seeds and chopped cilantro.
Notes
For chicken breasts, pressure cook for 10 minutes. To reduce calories, remove the skin after cooking.
- Prep Time: 10 minutes
- Cook Time: 20 minutes
- Category: Dinner
- Method: Pressure Cooking
- Cuisine: Asian
Nutrition
- Serving Size: 1 chicken thigh
- Calories: 433 kcal
- Sugar: 14 g
- Sodium: 633 mg
- Fat: 30 g
- Saturated Fat: 7 g
- Unsaturated Fat: 23 g
- Trans Fat: 0 g
- Carbohydrates: 17 g
- Fiber: 1 g
- Protein: 25 g
- Cholesterol: 142 mg