Learn how to prepare authentic Japanese fried chicken with a signature crispy exterior and juicy interior. This method uses a simple marinade and potato starch to achieve a professional takeout-style result at home.
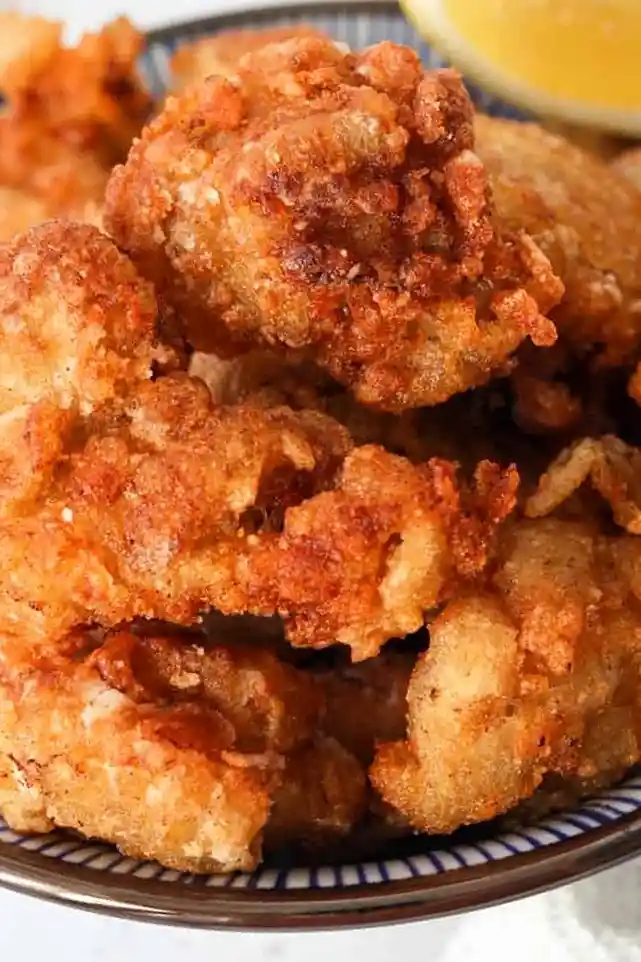
List of ingredients
- 1 lb skinless boneless chicken thighs (skin-on boneless thighs provide better results)
- 2 cups vegetable oil (or any neutral oil with a high smoke point)
- 1 cup potato starch (can be substituted with cornstarch, rice flour, or tapioca starch)
- 1 lemon (highly recommended for serving)
- 1 tbsp rice vinegar (as a substitute for sake)
- 1 tsp white granulated sugar
- 1 tbsp water mixed with 1 tsp sugar (as a substitute for mirin)
- 2 tbsp regular soy sauce (do not use dark soy sauce)
- 1 tbsp grated ginger
- 1 tsp grated garlic
- 1/4 tsp black pepper
step-by-step instructions
- Prepare Chicken: Dice chicken thighs into bite-sized pieces, roughly 1.5 inches wide. Keep the skin on if using skin-on thighs, then place them in a large mixing bowl.
- Marinate: Add the rice vinegar, sugar, sugar-water mixture, soy sauce, grated ginger, grated garlic, and black pepper to the chicken. Massage the marinade into the meat and let it rest for 15 minutes for maximum flavor absorption.
- Coat: Pour potato starch into a separate mixing bowl. Dredge a few pieces of marinated chicken at a time until they are fully coated, then transfer them to a parchment-lined baking sheet.
- Heat Oil: Fill a heavy-bottomed pot or deep fryer with oil and heat to 350 degrees F. Use an instant-read thermometer or test with a wooden chopstick; bubbles should form immediately around the wood.
- Fry: Cook the chicken in small batches to avoid overcrowding the pan. Fry for 3-4 minutes total, flipping the pieces halfway through, until they are golden brown and crispy.
- Drain: Remove the chicken with a slotted spoon. Place the pieces on a wire rack or a baking sheet lined with paper towels to drain excess oil.
- Serve: Garnish with fresh lemon wedges and squeeze the juice over the chicken immediately before eating.
Optimizing the Frying Process
Maintaining a Consistent Oil Temperature
Temperature control is the most critical factor for achieving a crispy crust. If the oil is below 325 degrees F, the chicken will absorb too much fat and become greasy. If it exceeds 375 degrees F, the outside will burn before the inside is fully cooked.
Preventing Pan Overcrowding
Adding too many pieces of chicken at once causes the oil temperature to drop rapidly. This leads to steaming instead of frying, which results in a soggy coating. Fry in small batches to ensure the oil stays at the target temperature.
Implementing the Double Fry Method
For professional-grade crispiness, fry the chicken once at 350 degrees F and remove it. Let it rest for a few minutes, then fry it again for 60 seconds at a slightly higher temperature. This second pass evaporates remaining surface moisture and hardens the crust.
Selecting the Right Frying Vessel
A heavy-bottomed pot or a cast-iron dutch oven is ideal because it retains heat more efficiently than thin pans. This stability helps prevent the drastic temperature swings that occur when adding cold marinated meat to hot oil.
Ingredient Selection and Substitutions
Using Dark Meat for Maximum Juiciness
Chicken thighs are preferred over breasts because their higher fat content prevents the meat from drying out during deep frying. Breast meat cooks much faster and can become tough or rubbery if overcooked by even a minute.
Comparing Different Starch Options
Potato starch is the traditional choice as it creates a light, thin, and exceptionally crispy shell. Cornstarch is a viable alternative, though it produces a slightly denser crust, while rice flour provides a very hard, crunchier texture.
Choosing High Smoke Point Oils
Use oils such as avocado, canola, peanut, or vegetable oil, which can withstand high temperatures without breaking down. Avoid extra virgin olive oil or butter, as their low smoke points will cause the oil to smoke and impart a bitter taste.
Soy Sauce and Salt Balance
Regular soy sauce provides the necessary salt and umami flavor for the marinade. If you prefer less salt, use low-sodium soy sauce or tamari, but avoid dark soy sauce as it is too thick and will color the chicken too darkly.
Troubleshooting Common Results
Eliminating the White Starchy Coating
A white, powdery residue occurs when excess starch is not fully hydrated or cooked. To prevent this, let the coated chicken rest for 15 minutes before frying so the moisture from the meat absorbs the starch. Shake off any loose powder just before adding to the oil.
Fixing Sogginess After Frying
Placing fried chicken directly on a flat plate traps steam underneath the meat, which softens the bottom crust. Always use a wire cooling rack to allow air to circulate around the entire piece of chicken.
Preventing Undercooked Centers
If the chicken is brown on the outside but raw inside, your oil temperature was likely too high. Use a meat thermometer to ensure the internal temperature reaches 165 degrees F before removing from the oil.
Reducing Oil Absorption
Ensure the oil is fully up to temperature before adding the chicken. If the meat is added to lukewarm oil, the starch will soak up the fat instead of searing, resulting in a heavy, oily mouthfeel.
Storage and Reheating Techniques
Refrigeration Guidelines
Store leftover karaage in an airtight container in the refrigerator for up to four days. To prevent the chicken from becoming mushy, let it cool completely before sealing the container to avoid trapping steam.
Freezing for Long Term Storage
Place cooked and cooled chicken in a freezer-safe bag, removing as much air as possible. They can be stored for up to three months, though the texture may degrade slightly compared to fresh pieces.
Restoring Crispiness with an Air Fryer
The air fryer is the best tool for reheating fried chicken. Heat at 350 degrees F for 5-6 minutes, shaking the basket halfway through to ensure all sides are crisp.
Oven Reheating Instructions
Preheat your oven to 350 degrees F and place the chicken on a wire rack over a baking sheet. Heat for about 6-10 minutes, which allows the hot air to crisp the skin without the need for additional oil.
Serving and Pairing Recommendations
Traditional Japanese Side Dishes
Serve karaage with a bowl of steamed short-grain white rice and a side of miso soup. A Japanese cabbage salad with a sesame or ginger dressing provides a refreshing contrast to the richness of the fried chicken.
Creating Custom Dipping Sauces
While lemon juice is traditional, you can serve this with Kewpie mayo or a spicy mayo made with sriracha and mayonnaise. A ponzu dipping sauce adds a citrusy, salty depth that complements the ginger in the marinade.
Balanced Vegetable Pairings
Pair the chicken with steamed broccoli, sautéed spinach, or pickled daikon radish. These vegetables add acidity and nutrients, balancing the heavy nature of the deep-fried protein.
Frequently Asked Questions
Can I make this in advance?
You can prepare the marinated chicken and store it in the fridge for 24 hours before frying. However, the frying process should be done immediately before serving to maintain the crispy texture.
Why isn’t my karaage crispy?
Non-crispy results are usually caused by oil that is too cold, overcrowding the pan, or using all-purpose flour instead of a starch. Ensure your oil is at 350 degrees F and use potato or cornstarch for the best crust.
Can I use all-purpose flour?
All-purpose flour contains gluten, which creates a bread-like crust rather than the thin, crispy shell characteristic of karaage. For an authentic result, stick to potato starch, cornstarch, or rice flour.
How do I know the chicken is done?
The chicken should be golden brown on the outside and the juices should run clear when pierced. For absolute certainty, use a digital thermometer to check for an internal temperature of 165 degrees F.
Can I bake this instead of frying?
Baking is possible at 400 degrees F on a wire rack, but it will not produce the same crispy texture as deep frying. The starch requires the immersion in hot oil to gelatinize and crisp properly.
Print
Crispy Japanese Karaage Chicken Guide
- Total Time: 30 minutes
- Yield: 4 servings 1x
- Diet: General
Description
If you love extra crispy, flavorful chicken, this quick and easy Karaage recipe is for you! It’s a Japanese fried chicken that hits the spot and made with simple ingredients.
Ingredients
- 1 lb skinless boneless chicken thighs
- 2 cups vegetable oil
- 1 cup potato starch
- 1 lemon
- 1 tbsp rice vinegar
- 1 tsp white granulated sugar
- 1 tbsp water mixed with 1 tsp sugar
- 2 tbsp regular soy sauce
- 1 tbsp ginger, grated
- 1 tsp garlic, grated
- 1/4 tsp black pepper
Instructions
- Step 1: Dice chicken thighs into bite size pieces, about 1.5-inch wide pieces and transfer to a large bowl.
- Step 2: Add marinade ingredients and massage into meat until well combined; let marinate for 15 minutes.
- Step 3: Dredge marinated chicken in potato starch until well coated and transfer to a plate or baking sheet.
- Step 4: Heat vegetable oil to 350 degrees F in a heavy bottomed pot or deep fryer.
- Step 5: Fry chicken in small batches until golden crispy brown, about 3-4 minutes total, flipping halfway.
- Step 6: Remove fried chicken with a slotted spoon and transfer to a wire rack or paper towels to remove excess oil.
- Step 7: Serve with a squeeze of fresh lemon juice over top.
Notes
Use dark meat for best results. To avoid a white coating, let the coated chicken rest for 15 minutes and shake off excess starch before frying.
- Prep Time: 15 minutes
- Cook Time: 15 minutes
- Category: Appetizer, Main Course
- Method: Deep Frying
- Cuisine: Japanese
Nutrition
- Serving Size: 1 serving
- Calories: 401 kcal
- Sugar: 3 g
- Sodium: 626 mg
- Fat: 19 g
- Saturated Fat: 5 g
- Unsaturated Fat: 12 g
- Trans Fat: 1 g
- Carbohydrates: 36 g
- Fiber: 1 g
- Protein: 20 g
- Cholesterol: 111 mg