This oven-baked chicken recipe provides a crispy exterior and juicy interior without the need for deep frying. It is a quick, efficient meal that uses a simple breading method to ensure consistent results every time.
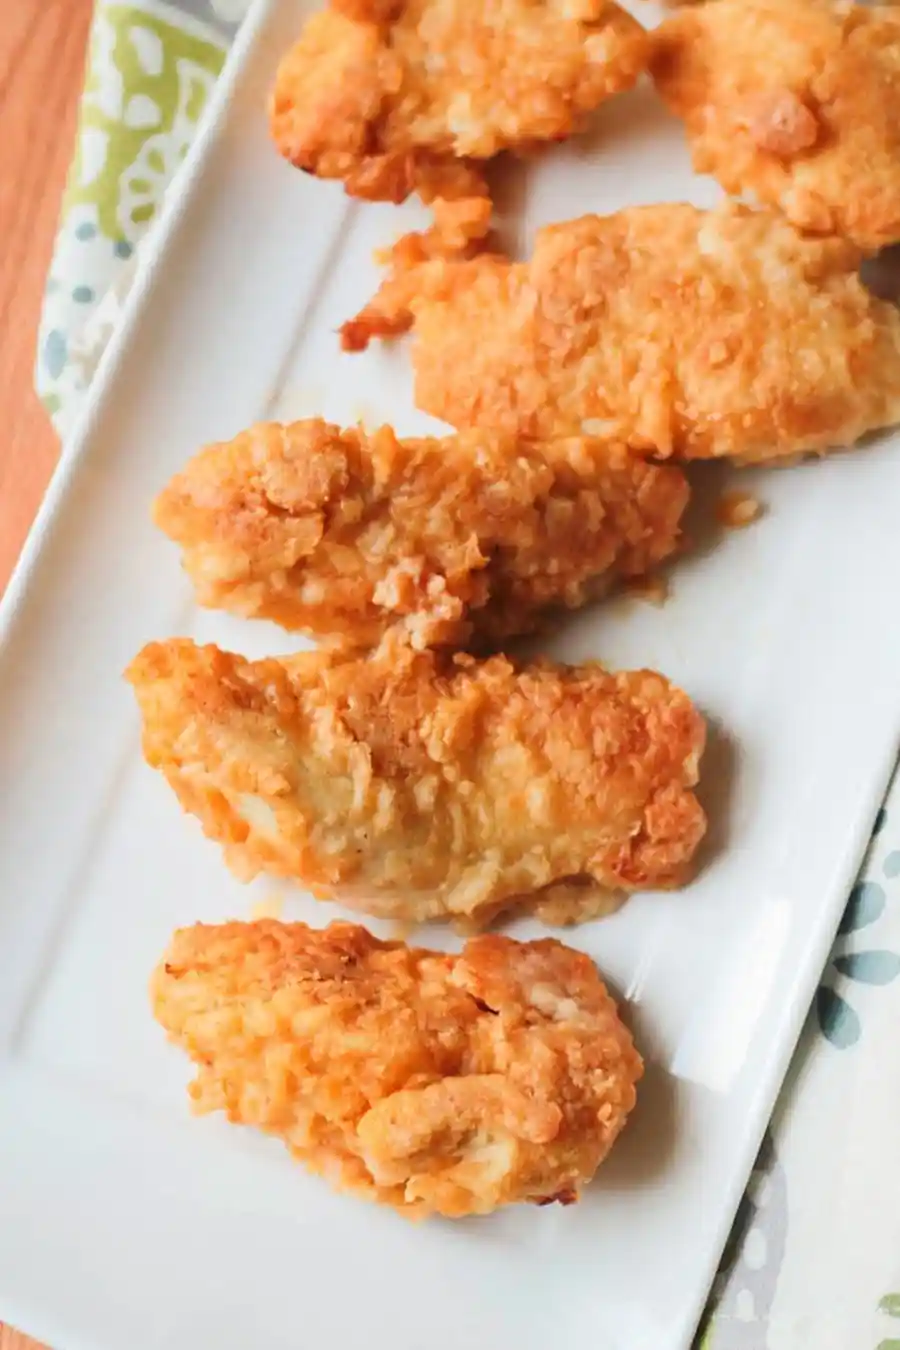
List of ingredients
- 3 chicken breasts – trimmed and cut into 2-3 strips each for even cooking.
- 4 tablespoons butter – used to create a shallow fry effect in the pan.
- 1 cup flour – provides the base for the crispy coating.
- 1/2 teaspoon salt – enhances the natural flavor of the meat.
- 1 tablespoon seasoning salt – adds a complex, savory depth to the breading.
- 1/2 teaspoon pepper – provides a mild, warm spice.
- 2 teaspoons paprika – gives the chicken a rich golden-brown color and subtle sweetness.
step-by-step instructions
- Preheat Oven: Set your oven to 400 degrees Fahrenheit to ensure it is hot enough for immediate searing.
- Melt Butter: Place 4 tablespoons of butter in a large baking dish, such as a 9 x 13 inch pan, and place it in the preheated oven until fully melted.
- Prepare Breading: Combine the flour, salt, seasoning salt, pepper, and paprika in a ziplock bag, shaking it well to distribute the spices evenly.
- Coat Chicken: Add the chicken strips to the bag and toss them thoroughly until every piece is completely coated in the seasoned flour.
- Arrange Chicken: Carefully remove the baking dish from the oven and place the chicken pieces into the melted butter, ensuring they do not touch or overlap.
- First Bake: Return the dish to the oven and cook for 10 to 12 minutes.
- Flip Chicken: Use tongs to flip each piece of chicken over and return the pan to the oven for another 10 to 12 minutes.
- Drain and Serve: Once the chicken is cooked through, move the pieces to paper towels to drain any excess grease before serving immediately.
Expert Tips for Maximum Crunch
Prevent Overcrowding the Baking Dish
Leaving space between the chicken pieces is essential for air circulation. When chicken pieces touch, they steam instead of roast, which results in a soggy crust. Use a larger pan if you are increasing the batch size.
Ensure Butter is Fully Melted
Placing the butter in the oven to melt before adding the chicken creates a hot surface. This mimics the effect of shallow frying, which helps the flour sear instantly upon contact. This step is critical for achieving a golden-brown finish.
Pat Chicken Dry Before Coating
Removing excess moisture from the surface of the chicken breasts helps the flour adhere better. If the meat is too damp, the breading may clump or peel off during the baking process. Use a clean paper towel to dry each strip thoroughly.
Check Oven Temperature Accuracy
Using an oven thermometer can ensure your oven is truly at 400 degrees. Some ovens fluctuate, and if the temperature is too low, the chicken will dry out before the crust crisps. A consistent high heat is key to juicy meat.
Ingredient Substitutions
Using Gluten-Free Flour
You can replace the all-purpose flour with a 1:1 gluten-free flour blend. Almond flour can also be used, though it may brown more quickly due to its higher fat content. Adjust the baking time slightly if using nut-based flours.
Replacing Butter with Oil
If you prefer not to use butter, melted olive oil or avocado oil are excellent alternatives. Avocado oil is particularly useful because of its high smoke point. This substitution will result in a slightly different flavor profile but similar crispiness.
Adjusting Seasoning Salt
If you do not have seasoning salt, you can make a substitute using regular salt, garlic powder, and onion powder. Mix equal parts of these three ingredients to replicate the savory depth. Adjust the total salt amount to suit your taste preferences.
Substituting Paprika Varieties
Smoked paprika can be used instead of regular paprika for a more intense, woody flavor. For a spicier kick, use hot paprika or add a pinch of cayenne pepper. Regular paprika is best for achieving the classic golden color.
Flavor Variations
Adding a Spicy Kick
To create a spicy version, add 1/2 teaspoon of cayenne pepper or a tablespoon of chili powder to the flour mixture. You can also add a dash of hot sauce to the chicken strips before tossing them in the flour. This adds heat both inside and outside the coating.
Garlic and Herb Infusion
Incorporate 1 teaspoon of garlic powder and 1 teaspoon of dried oregano or thyme into the breading. These herbs complement the paprika and add an aromatic quality to the dish. This version pairs exceptionally well with lemon-based dipping sauces.
Lemon Pepper Twist
Replace the seasoning salt with lemon pepper seasoning for a bright, zesty flavor. Adding a small amount of lemon zest to the flour mixture further enhances this profile. This variation is particularly refreshing when served with a side of steamed vegetables.
Cheesy Breaded Coating
Mix 1/4 cup of finely grated parmesan cheese into the flour mixture. The cheese melts into the crust, creating a savory, salty topping that browns beautifully in the oven. Ensure the cheese is very finely grated to avoid large burnt clumps.
Serving Suggestions
Classic Side Pairings
Serve this chicken with creamy mashed potatoes and steamed corn for a traditional meal. The richness of the potatoes balances the seasoned crust of the chicken. Adding a side of honey-glazed carrots provides a nice sweetness to the plate.
Fresh Vegetable Accompaniments
A crisp garden salad with a light vinaigrette helps cut through the richness of the butter-baked coating. Alternatively, steamed broccoli or sautéed spinach adds necessary nutrients and color. These options keep the meal balanced and healthy.
Dipping Sauce Options
A homemade honey mustard sauce is a perfect complement to the savory paprika breading. You can also serve it with a side of ranch dressing or a spicy BBQ sauce for dipping. For a lighter option, try a squeeze of fresh lemon juice.
Grain-Based Side Dishes
Wild rice or quinoa cooked in vegetable broth makes for a hearty accompaniment. A simple buttered noodle dish or a wild rice pilaf also works well. These grains soak up any remaining butter from the chicken plating.
Storage and Reheating
Proper Refrigeration Methods
Place leftover chicken in an airtight container once it has cooled to room temperature. Store it in the refrigerator for up to three to four days. To prevent the crust from softening, you can place a piece of paper towel at the bottom of the container.
Freezing for Long Term
Flash-freeze the cooked chicken pieces on a baking sheet for one hour before transferring them to a freezer bag. This prevents the pieces from sticking together. They can be stored in the freezer for up to two months.
Oven Reheating Technique
To maintain the crispiness of the coating, reheat the chicken in the oven at 350 degrees Fahrenheit. Place the pieces on a wire rack over a baking sheet to allow air to circulate around the bottom. Heat for 5 to 10 minutes or until warmed through.
Air Fryer Reheating
An air fryer is the fastest way to regain the original crunch of the chicken. Heat the air fryer to 375 degrees Fahrenheit and cook the pieces for 3 to 5 minutes. This method removes excess oil while crisping the exterior quickly.
Make-Ahead Advice
Pre-cutting the Chicken
You can trim and cut the chicken breasts into strips a day in advance. Store them in a sealed container or zip-top bag in the refrigerator. This reduces the active prep time on the day of cooking.
Preparing the Flour Mix
The seasoned flour mixture can be combined and stored in a jar or bag for several weeks. Keep the mixture in a cool, dry place to prevent the spices from clumping. Simply pour the desired amount into a bag when ready to bread the chicken.
Timing the Coating Process
Avoid coating the chicken in flour too far in advance, as the moisture from the meat will soak into the flour. This creates a paste-like consistency rather than a powdery coating. Bread the chicken immediately before placing it in the melted butter.
Pre-warming the Pan
If you are coordinating multiple dishes, you can preheat the oven and melt the butter shortly before you finish breading the chicken. This ensures the butter is hot and bubbling exactly when the chicken is ready to be placed in the pan.
Troubleshooting Common Issues
Managing Soggy Bottoms
If the bottom of the chicken is not crisp, it may be due to too much butter or overcrowding. Ensure you are using a large enough pan so the butter doesn’t pool too deeply. Using a wire rack inside the baking dish can also help air reach the bottom.
Preventing Overcooked Meat
Chicken breasts can dry out quickly if cooked too long. Use a meat thermometer to check that the internal temperature has reached 165 degrees Fahrenheit. Remove the chicken from the oven immediately once this temperature is achieved.
Fixing a Pale Crust
If the chicken looks pale, your oven temperature may be too low. Double-check the heat setting and ensure the oven has fully preheated. Increasing the paprika amount can also help achieve a deeper golden-brown color visually.
Dealing with Coating Loss
If the breading falls off, the chicken was likely too wet when coated. Always pat the meat dry with paper towels first. Pressing the flour firmly into the meat while tossing in the bag also helps create a stronger bond.
Frequently Asked Questions
Can I use chicken thighs instead of breasts?
Yes, you can use boneless, skinless chicken thighs. Because thighs have more fat, they may take slightly longer to cook and may release more juice. Adjust the baking time by 2 to 4 minutes per side and ensure they are not overlapping.
Do I need to use a ziplock bag for breading?
While a bag is convenient and mess-free, you can use a shallow bowl or a plastic container. Simply toss the chicken in the flour and shake the container to coat. The bag is recommended primarily for efficiency and easier cleanup.
Can I use a baking sheet instead of a baking dish?
You can use a rimmed baking sheet, but the butter will spread thinner than it does in a dish. This may result in a slightly less ‘fried’ texture on the bottom. If using a sheet, ensure the butter is evenly distributed across the surface.
Is it necessary to flip the chicken?
Flipping the chicken is necessary to ensure both sides get direct contact with the hot butter. This creates an even crust and ensures the meat cooks uniformly. Skipping this step will leave the bottom side softer and less browned.
Print
Oven Fried Chicken
- Total Time: 40 minutes
- Yield: 4 servings 1x
- Diet: General
Description
A homemade, baked version of fried chicken that features a crisp seasoned coating and tender, juicy meat, offering a delicious alternative to traditional frying.
Ingredients
- 3 chicken breasts, trimmed and cut into 2–3 strips each
- 4 tablespoons butter
- 1 cup flour
- 1/2 teaspoon salt
- 1 tablespoon seasoning salt
- 1/2 teaspoon pepper
- 2 teaspoons paprika
Instructions
- Preheat: Preheat the oven to 400.
- Melt Butter: Place the butter in a large baking dish and place it in the oven to melt.
- Prepare Coating: Combine the flour, salt, seasoning salt, pepper, and paprika in a ziplock bag and toss to mix.
- Coat Chicken: Add the chicken to the bag and toss to coat all the chicken pieces.
- Arrange: Remove the baking dish from the oven and place the chicken pieces in the melted butter, making sure the chicken pieces are not touching or overlapping.
- First Bake: Return the baking dish to the oven and cook 10-12 minutes.
- Flip and Bake: Flip the chicken using tongs and return to the oven to cook an additional 10-12 minutes on the other side.
- Drain: When the chicken is cooked through, remove the baking dish from the oven and move the chicken to paper towels to drain any excess grease.
Notes
Ensure chicken pieces are not overlapping in the pan to achieve the crispiest coating.
- Prep Time: 15 minutes
- Cook Time: 25 minutes
- Category: Main Dish
- Method: Baking
- Cuisine: American
Nutrition
- Serving Size: 2-3 chicken strips
- Calories: 450 kcal
- Sugar: 2 g
- Sodium: 620 mg
- Fat: 22 g
- Saturated Fat: 10 g
- Unsaturated Fat: 12 g
- Trans Fat: 0 g
- Carbohydrates: 25 g
- Fiber: 1 g
- Protein: 35 g
- Cholesterol: 110 mg